IOC Feeds
The Intelligence Browser IOC Feeds turn research into proactive defense. They strengthens your threat detection and response posture by pushing intelligence directly into your security stack. Feeds deliver threat intelligence from Flare into your existing security tooling (SIEM, SOAR, EDR, TIP, or firewalls) in the following formats:
- Industry-Standard STIX/TAXII Format:This is delivered as two TAXII feeds:
- Flare CTI Feed: Carries the intelligence objects themselves, including indicators, malware, threat actors, campaigns, and the other entity types.
- Flare CTI Relationship Feed: Carries the STIX relationships that connect those objects to one another, for example linking an indicator to the malware, campaign, and threat actor it belongs to.
Both feeds use the same configuration. They use TAXII 2.1, with basic authentication using your Flare API key. Each feed points to its own TAXII endpoint and collection, which Flare provides.
- Intelligence Browser API: The Intelligence Browser API offers a second automation option for users not currently utilizing STIX/TAXII.
Key Features
- Broad IOC coverage: Support for the core indicator types security teams rely on, such as, domains, URLs, IPs, file hashes, campaigns, threat actor profiles, and intrusion sets.
- STIX/TAXII delivery: All feeds use STIX 2.1 for the intelligence format and TAXII 2.1 as the transport protocol. This is the industry standard and most SIEMs, SOARs, TIPs, and EDRs support it natively. Your existing tooling can consume these feeds without custom integration work.
- STIX object relationships: Indicators are delivered with their full relationship context intact. An indicator links to the campaign it belongs to, which links to the threat actor behind it, which links to the associated malware family. Your TIP receives queryable, traversable intelligence, not a flat list.
- Standard API Support: For user not currently using STIX/TAXII, threat intelligence can be accessed using the standard API as well.
Access to this feature requires an add-on. Please reach out to your CSM for more information.
Trials
For trial accounts, once the CTI Module is enabled, these IOC feeds will begin populating from the moment the tenant is created. It does not backfill historical intelligence, so objects published before the feed existed will not appear in the collection.
Walkthrough
Click through the following product tour to learn how to integrate the IOC Feed into your existing security stack.
Configuring the IOC Feed in OpenCTI
Flare delivers intelligence through two TAXII feeds:
- The Flare CTI Feed carries the indicators (IOCs) along with their context objects, such as malware, campaigns, and tools.
- The Flare CTI Relationship Feed carries the relationships objects that connect each indicator to the malware, campaigns, and threat actors it belongs to, so the intelligence arrives connected rather than as isolated objects
Follow these steps to configure Flare's IOC feed in OpenCTI:
Create a new TAXII feed in OpenCTI, and use the following configuration for the Flare CTI Feed:
- Name: Flare CTI Feed
- TAXII server URL: https://api.flare.io/taxii2/cti/
- TAXII version: TAXII 2.1
- TAXII collection: f1a4ec71-0c00-4f5f-9dbd-e8a4cd33aa66
- Authentication type: Basic user / password
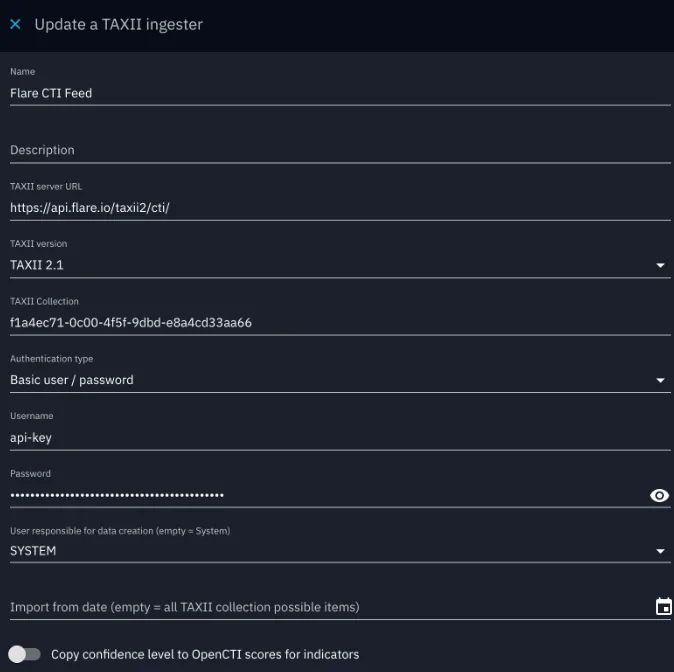
This points to Flare's TAXII server using TAXII 2.1 and the TAXII Collection ID Flare provides, authenticating with Basic auth (api-key as the username, a Flare API key as the password). An empty Import from date pulls the full collection.
Create a second TAXII feed, and use the following configuration for the Flare CTI Relationship Feed:
- Name: Flare CTI Relationship Feed
- TAXII server URL: https://api.flare.io/taxii2/cti/relationships/
- TAXII version: TAXII 2.1
- TAXII Collection: f1a4e540-2c14-4d5f-8bbc-2e7eb31ad104
- Authentication type: Basic user / password
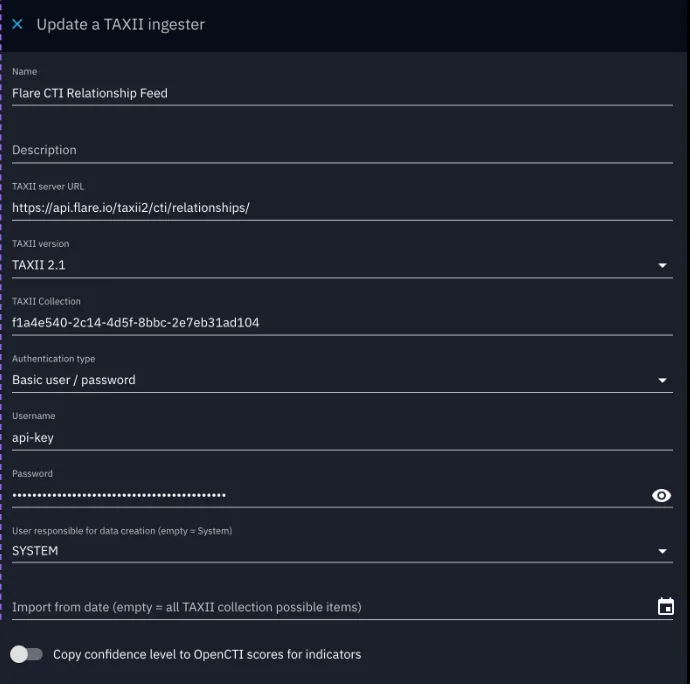
This points to the relationships endpoint using TAXII 2.1 and its own TAXII Collection, with the same Basic auth (api-key as the username, a Flare API key as the password). Ingesting it alongside the main feed is what links each indicator to its malware, campaigns, and actors
With both feeds configured and active, the TIP polls Flare's TAXII server on a schedule and pulls new and updated objects automatically. No manual exports or imports are involved once the connection is in place.
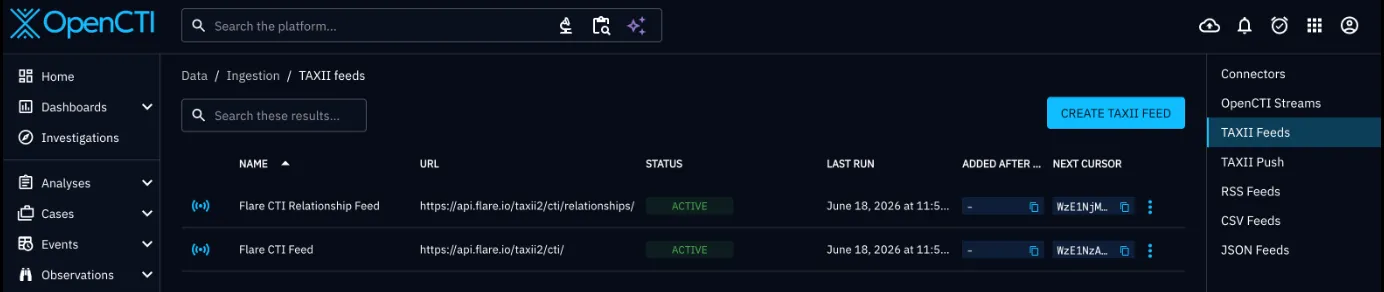
As ingestion runs, indicators flow into the platform.
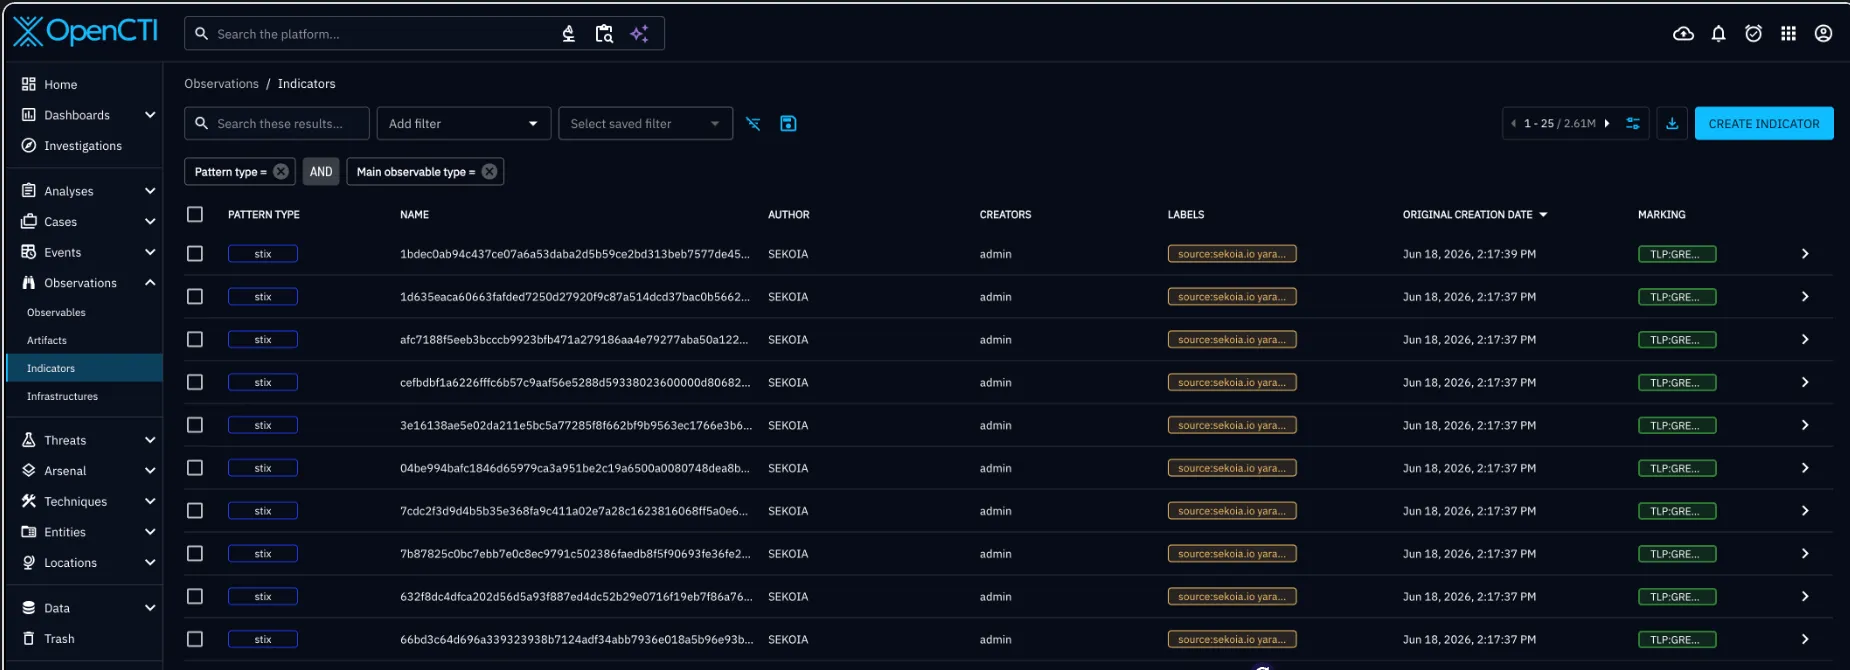
Each indicator arrives with full context showing STIX pattern, a score and confidence level, kill chain phases, execution, and other information.
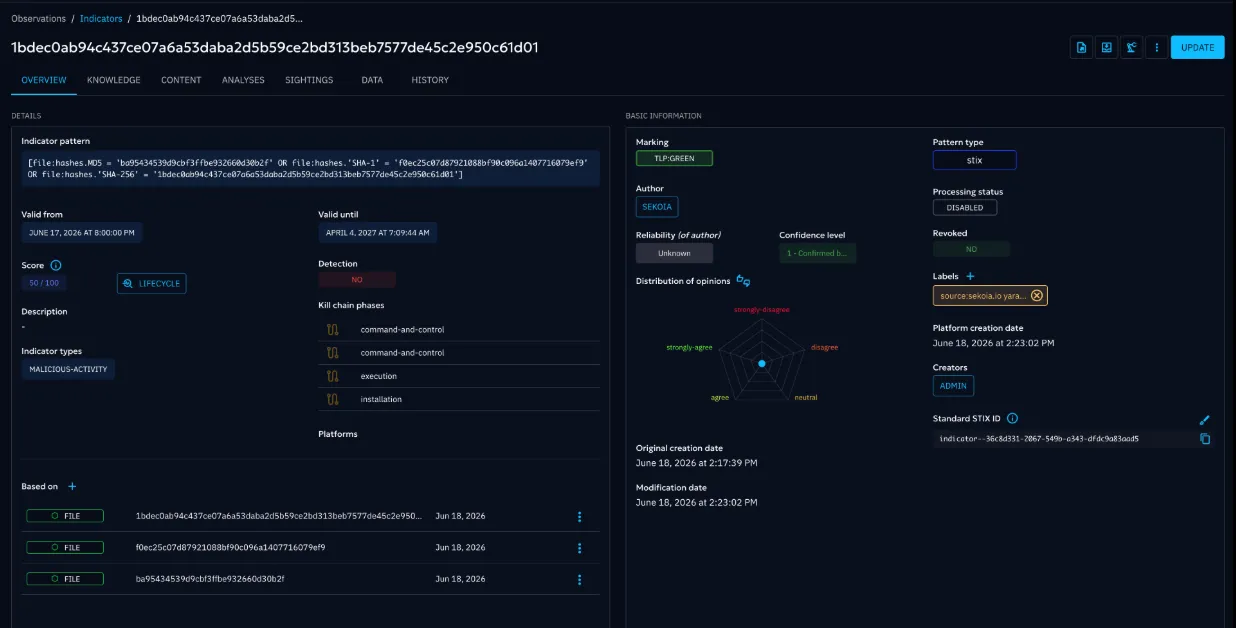
With this context in place, the TIP can apply the indicators to detection and blocking rules.
Integrating the IOC Feed with MISP
Flare delivers intelligence through two TAXII feeds:
- The Flare CTI Feed carries the indicators (IOCs) along with their context objects, such as malware, campaigns, and tools.
- The Flare CTI Relationship Feed carries the relationships objects that connect each indicator to the malware, campaigns, and threat actors it belongs to, so the intelligence arrives connected rather than as isolated objects
Follow these steps to configure Flare's IOC feed in MISP:
Setup the Environment
a. Create and activate a virtual environment, then install the two client libraries:
   python3 -m venv .venv && . .venv/bin/activate
   pip install pymisp taxii2-client
b. Set your connection details as environment variables, replacing the placeholder values with your own:
export FLARE_API_KEY="paste-your-flare-api-key"
export FLARE_SDO_COLLECTION_URL="https://api.flare.io/taxii2/cti/collections/<SDO_ID>/"
export FLARE_SRO_COLLECTION_URL="https://api.flare.io/taxii2/cti/relationships/collections/<SRO_ID>/"
export MISP_URL="https://your-misp.example.com"
export MISP_KEY="your-misp-automation-key"
export MISP_VERIFY_SSL="true" # "false" only for a self-signed lab instance- FLARE_SDO_COLLECTION_URL points to the Flare CTI Feed, and
- FLARE_SRO_COLLECTION_URL points to the Flare CTI Relationship Feed. Set
- MISP_VERIFY_SSL to false only for a self-signed lab instance.
Test the connection
Run this script first to confirm your API key works and to list the collections your key can reach.
Import Indicators
Run this script to validate the pipeline with a first import. It pulls the last day of indicators into a single MISP event and does not include relationships.
Import Indicators With Relationships
Once the pipeline is working, use this script for the full import. It pulls the relationships first, then the objects they reference, and uploads them together so that each indicator lands in MISP tagged with its related malware, campaign, or tool. It records a timestamp in a state file for incremental sync, so each run only pulls what is new.
Schedule the Sync
Run the import script on a schedule so that MISP stays current. This cron entry runs it hourly:
# hourly, at :07
7 * * * * cd /opt/flare-misp && . .venv/bin/activate && ./ingest.py >> ingest.log 2>&1
Keep the state file on a persistent path so that incremental sync survives restarts. You can also run the script in a loop inside a container.
What the imported intelligence looks like
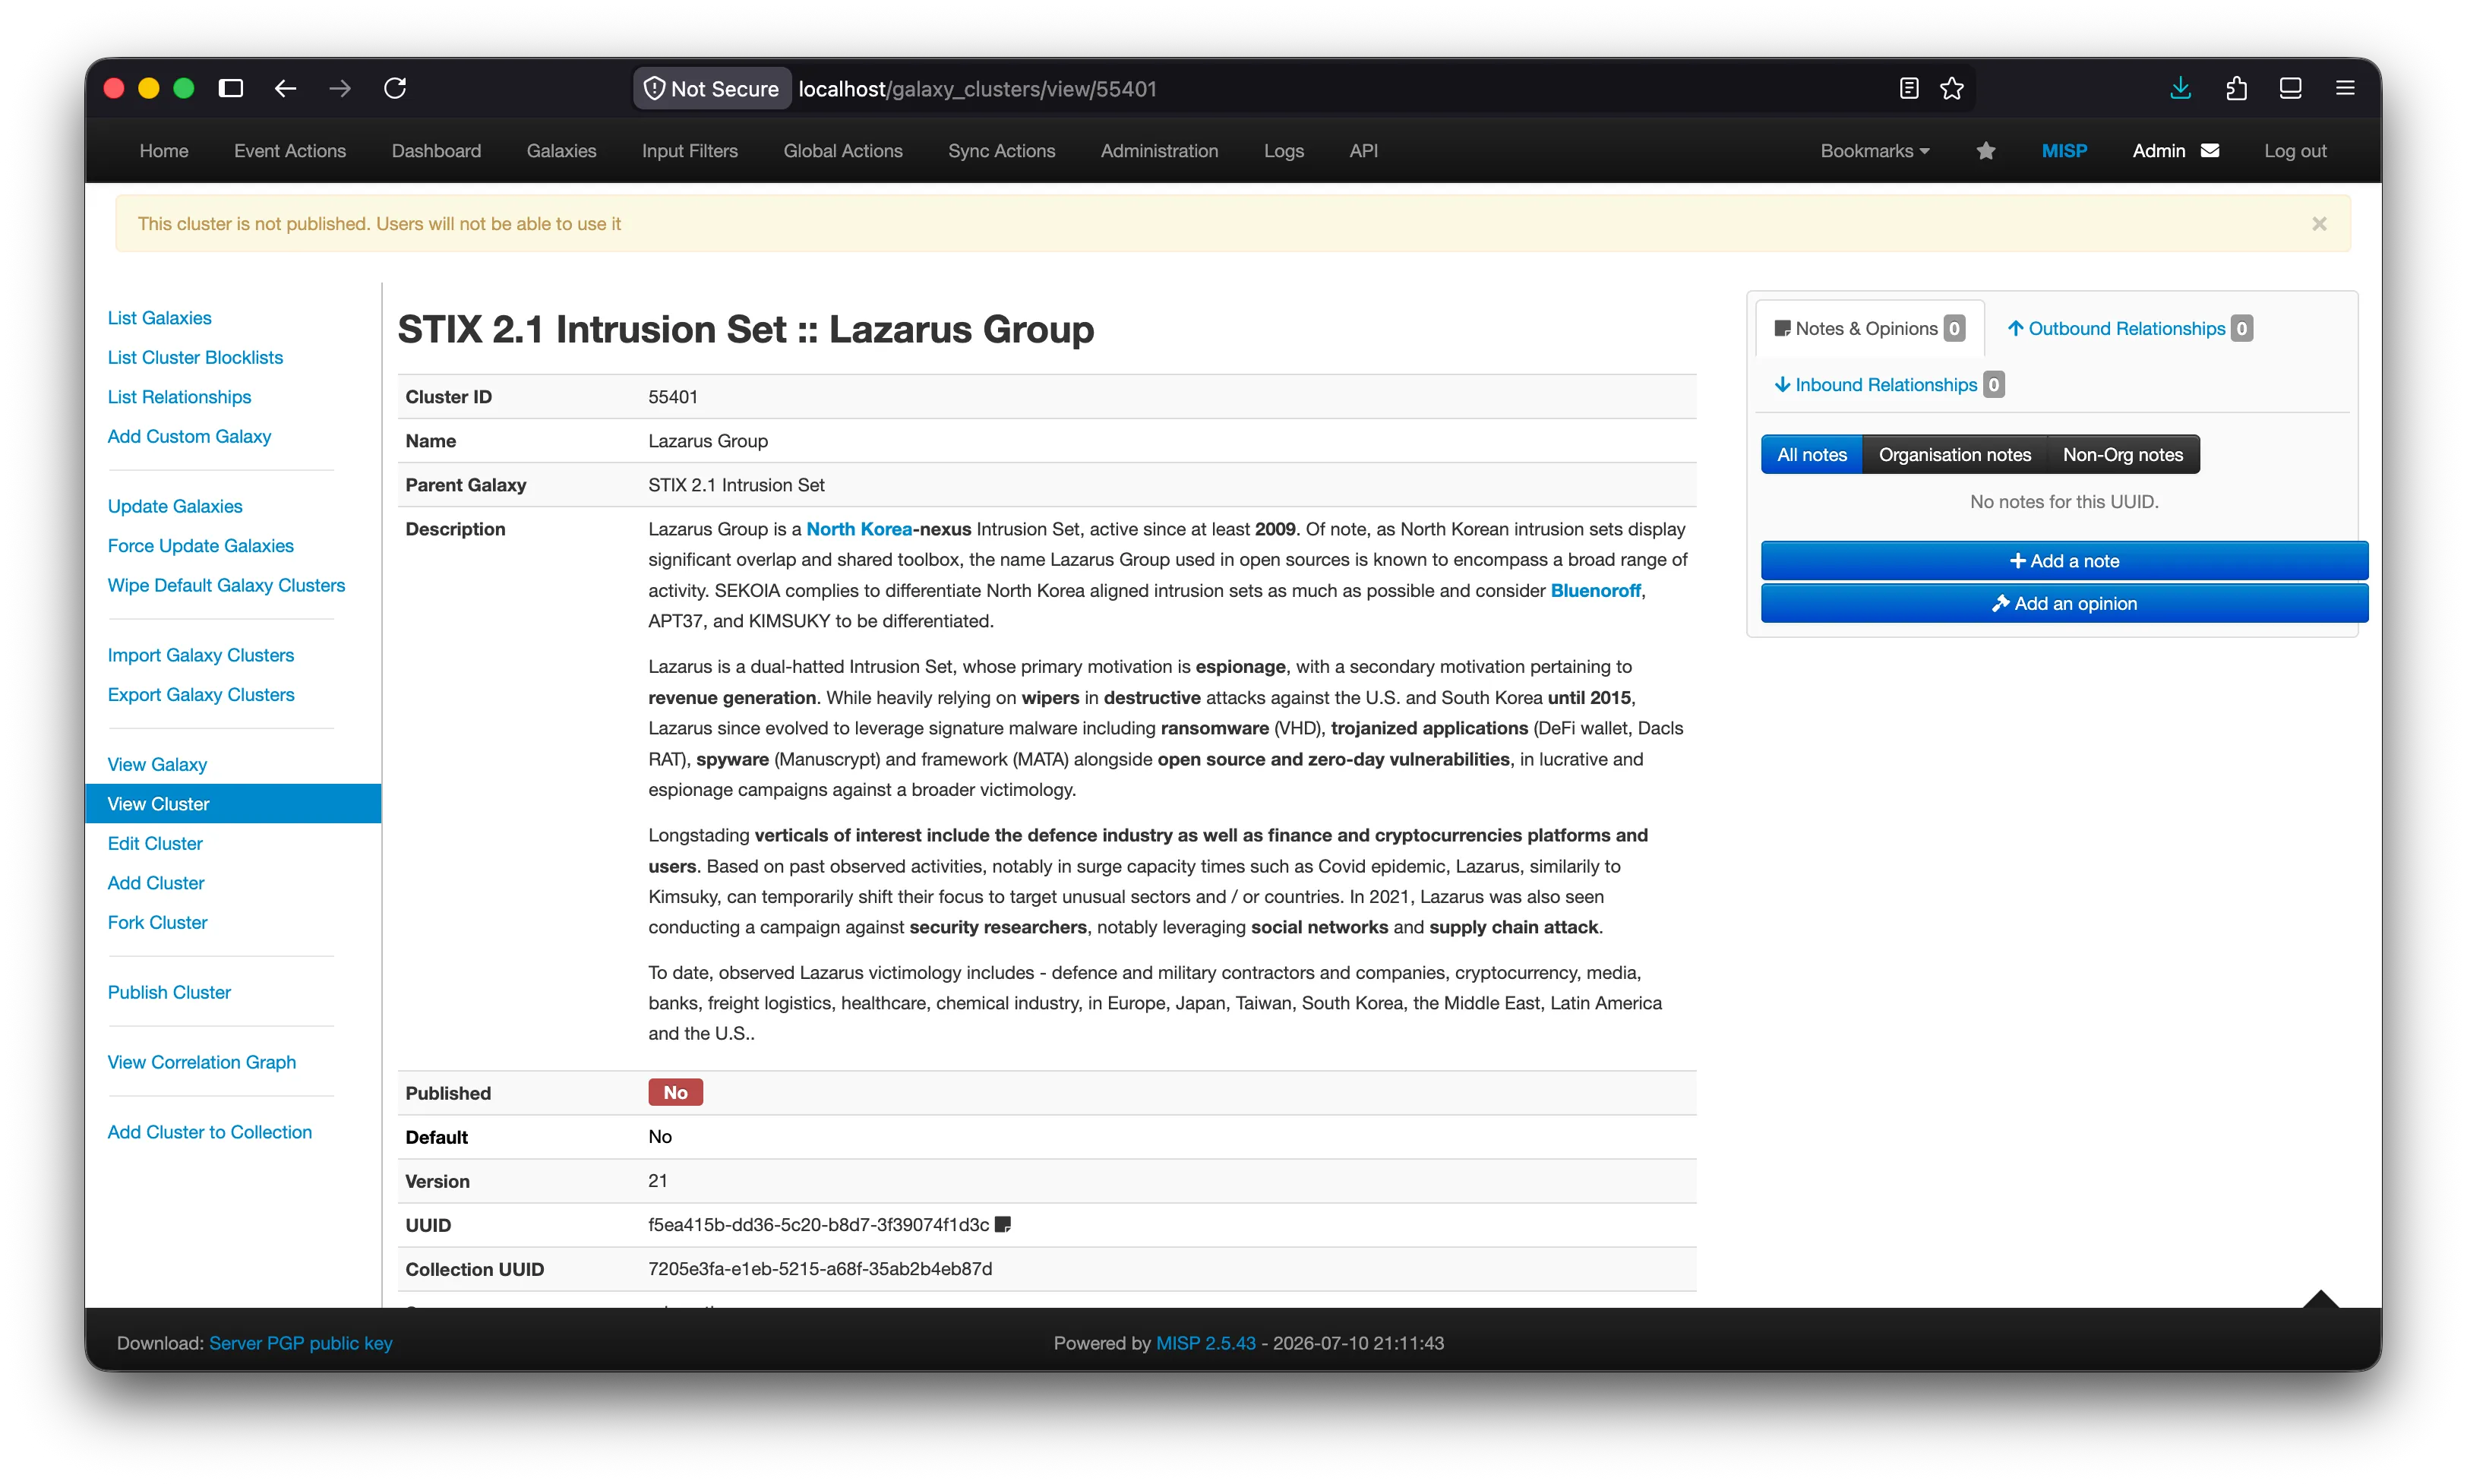
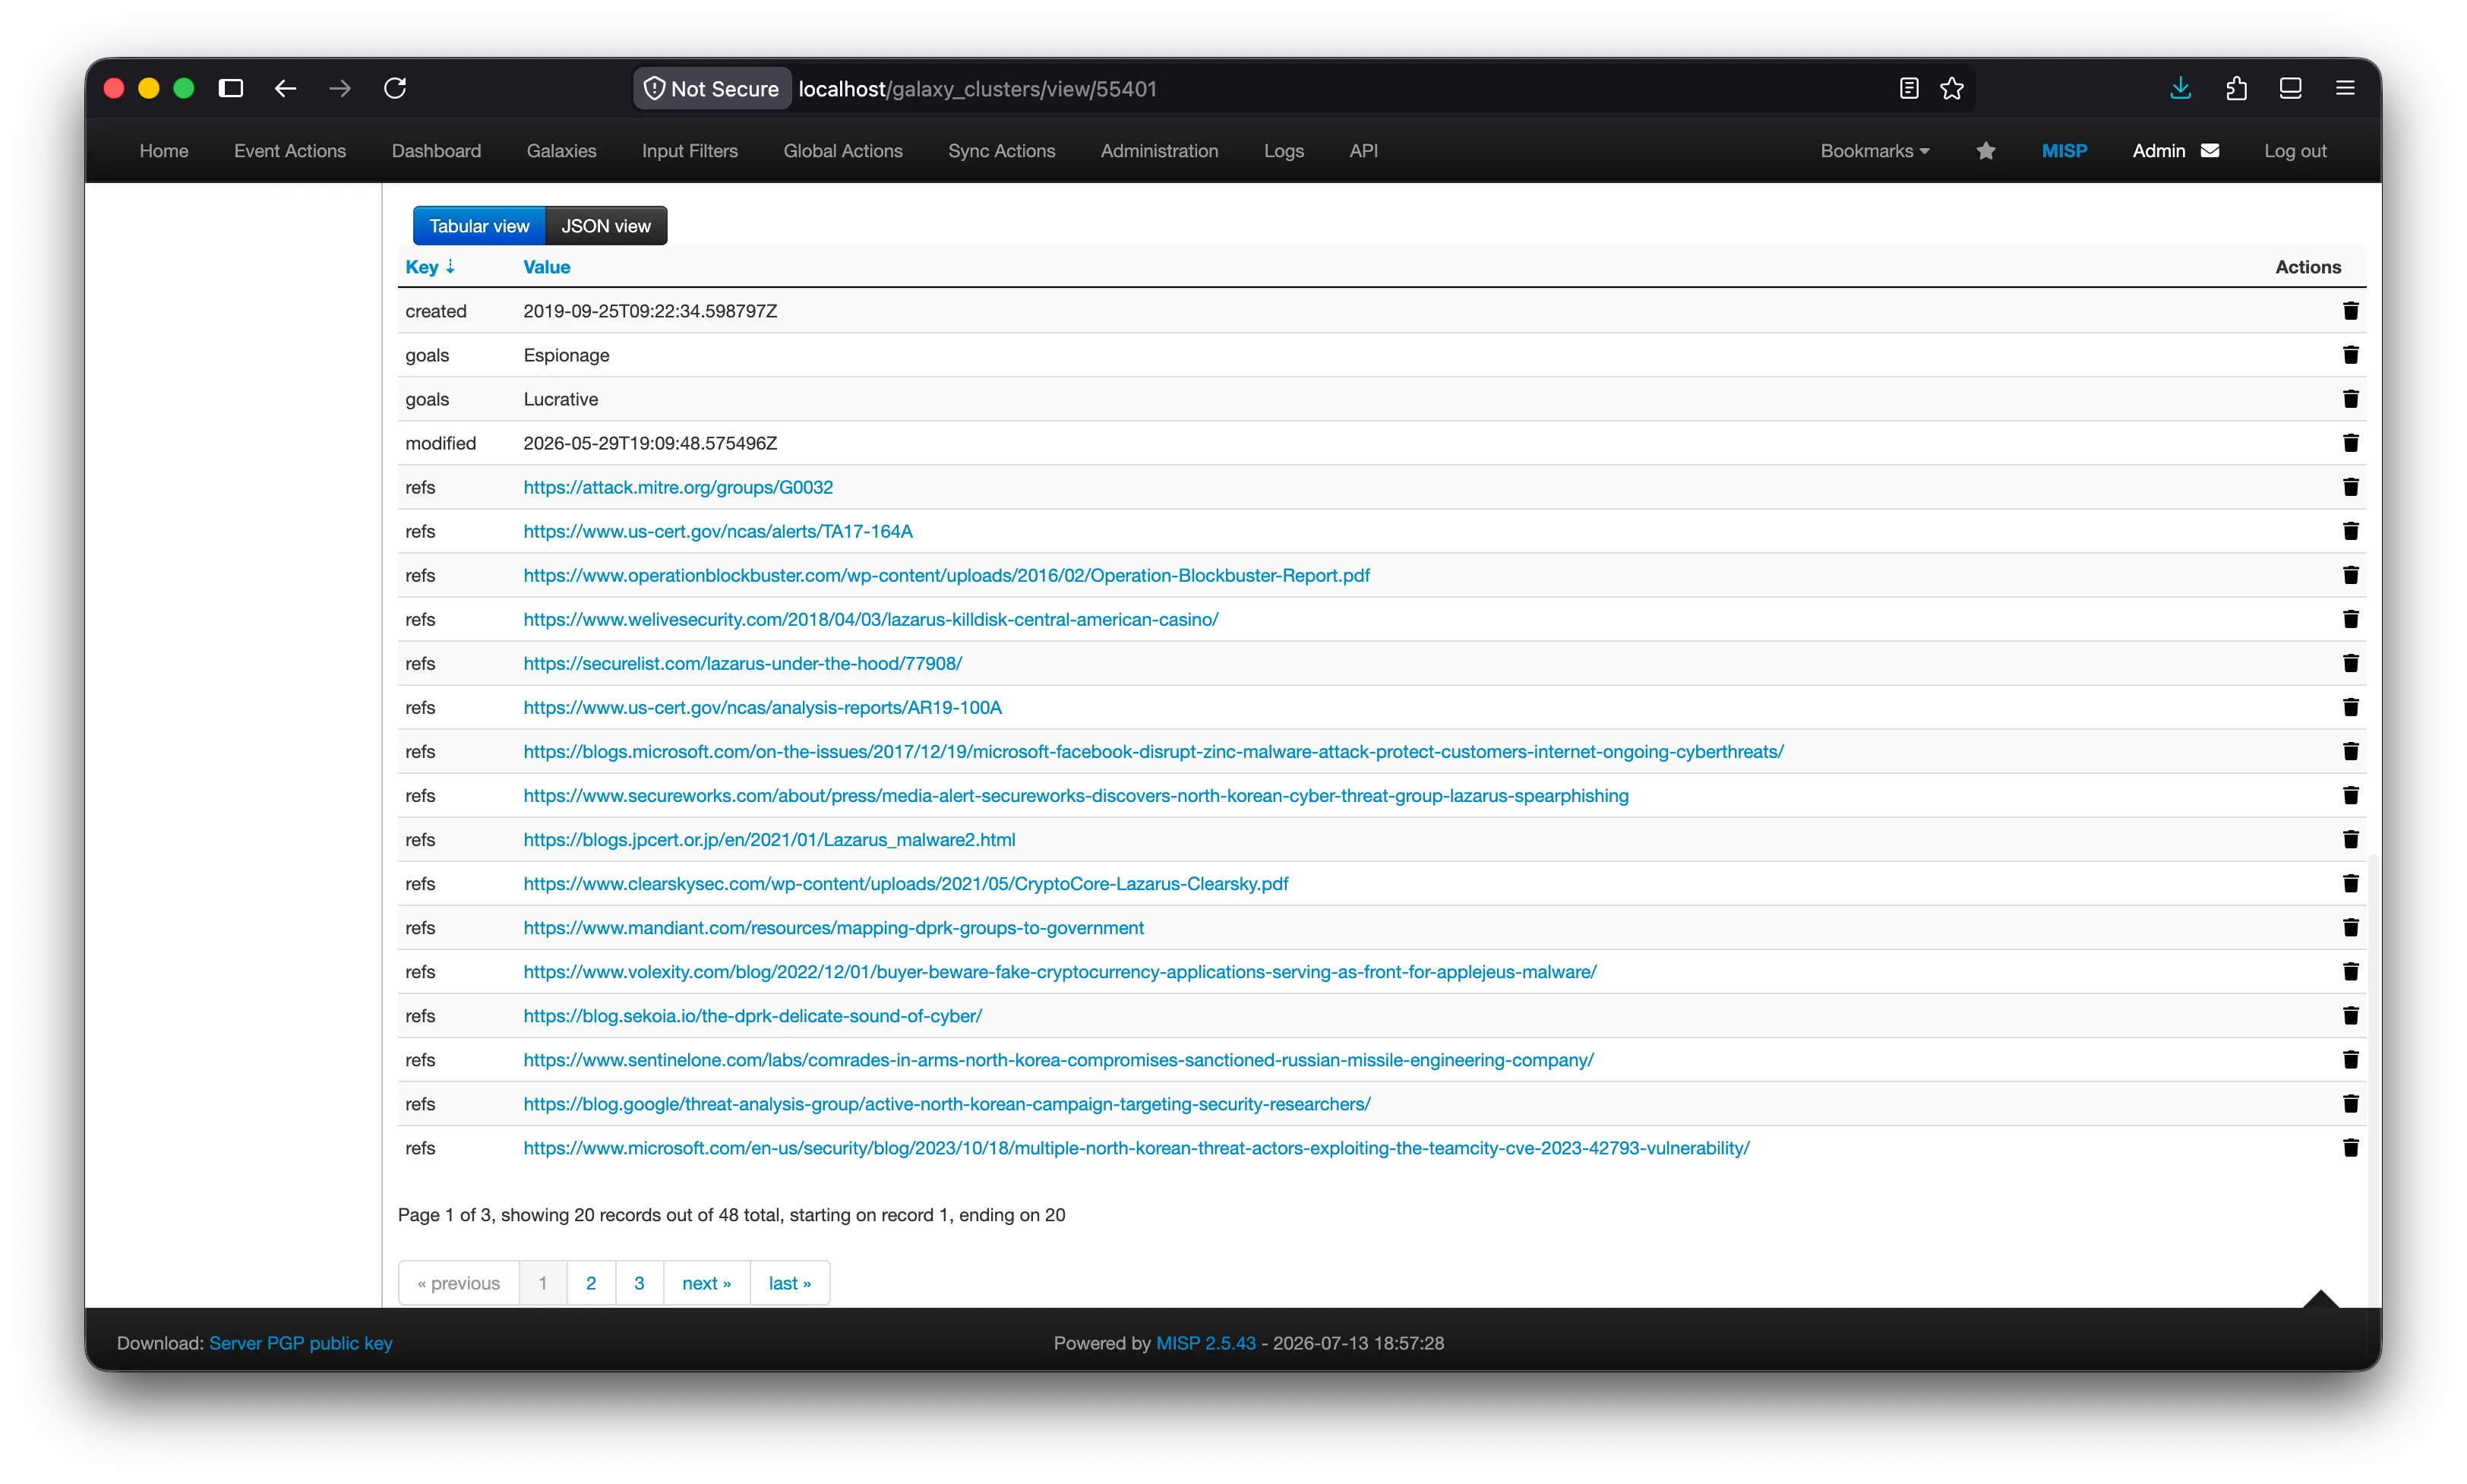
Once the import runs, the intelligence appears in MISP as a populated event. Here is an example of an event that came in with a campaign, several intrusion sets, malware, and a tool, along with the indicators and the relationships between them.
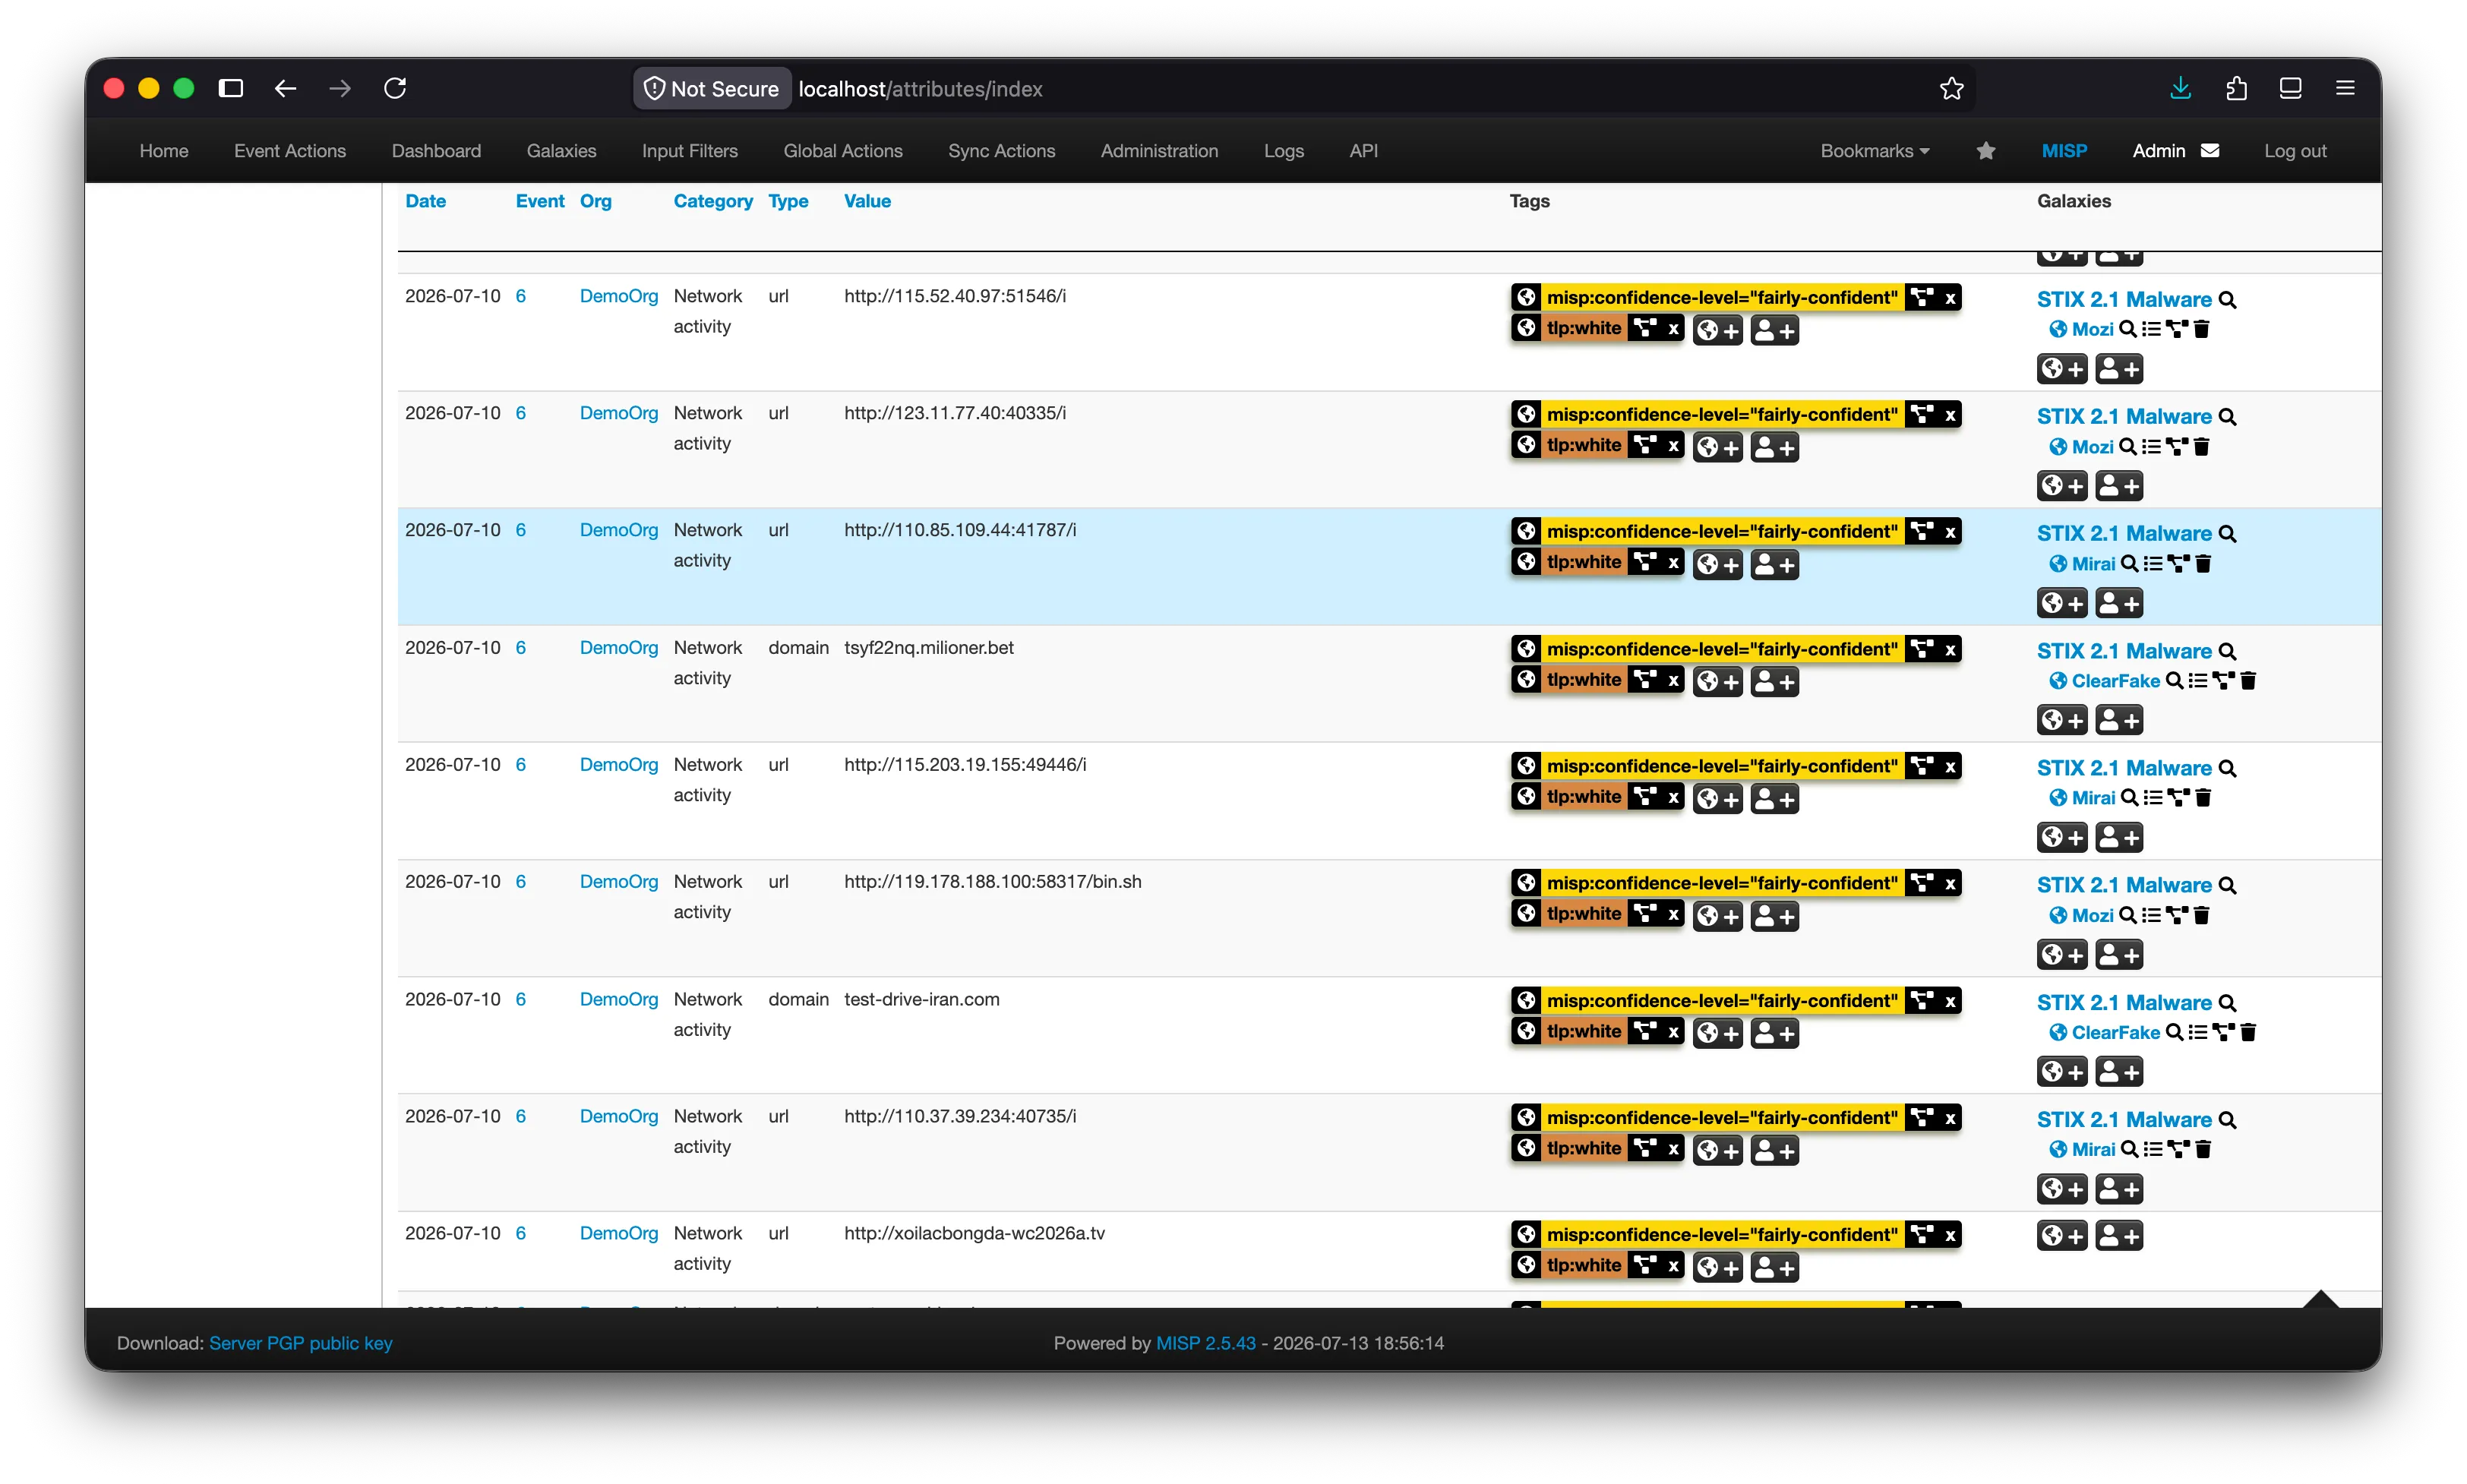
Under the event's attributes, each imported indicator carries its confidence level and TLP tags, and its related malware appears as a galaxy on the attribute. These galaxies are filterable and pivotable, so you can move from an indicator to the malware family behind it.
Imported indicators appear as event attributes, each tagged with its confidence level, TLP, and related malware galaxy.
Notes and troubleshooting
Here are some important things to keep mind:
- Test the scripts: Review and test all scripts before running in production
- Pull both feeds together: New indicators often reference older malware or campaign objects. If you pull only a narrow date window from both collections, those references will not resolve and MISP will show no relationships. The Step 4 script handles this by resolving referenced objects regardless of their age.
- Keep bundles modest and request only standard STIX types: MISP rejects very large uploads with an HTTP 413 error.
- Relationships appear as galaxies: In MISP, a linked indicator shows its related malware or campaign as a galaxy on the IOC, which you can filter and pivot on.