Profile
The Profile page is where you edit your personal account information and customize your Flare experience. From here you can view and update your personal information, adjust your preferences, and manage certain security settings.
To open your Profile, click the Account menu in the top-right corner, then click Profile.
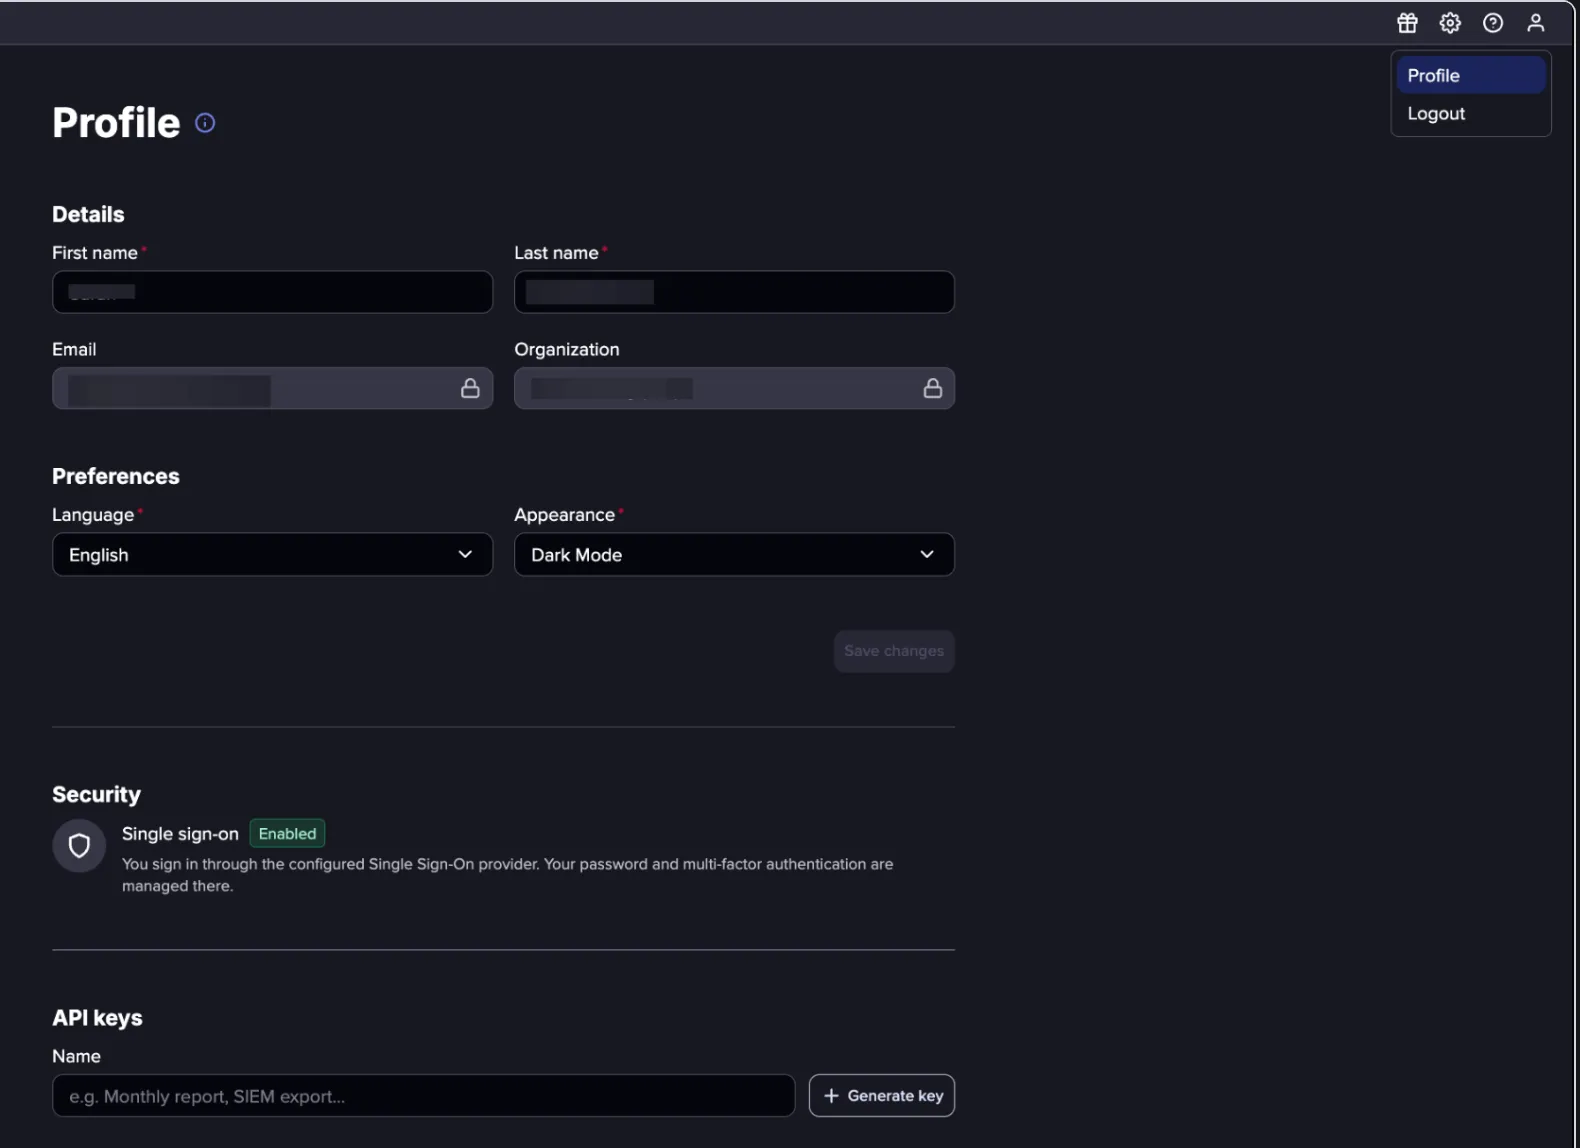
Details
The Details section holds your basic account information, including your name, email address, and organization.
Preferences
The Preferences section contains two settings:
- Language: Choose the display language for the Flare interface.
- Appearance: Choose your color scheme. Select Dark Mode, Light Mode, or Sync with system settings. The Sync with system settings option follows your operating system preference and switches automatically when your system theme changes.
After updating any field in Details or Preferences, click Save changes to apply them.
Security
The Security section shows the sign-in method configured for your account. When Single Sign-On (SSO) is Enabled, you sign in through the configured SSO provider, and your password and multi-factor authentication (MFA) are managed there rather than in Flare.
API Keys
API keys authenticate your requests when working with the Flare API. You can create, scope, and manage your keys from the API Keys section of your Profile page.
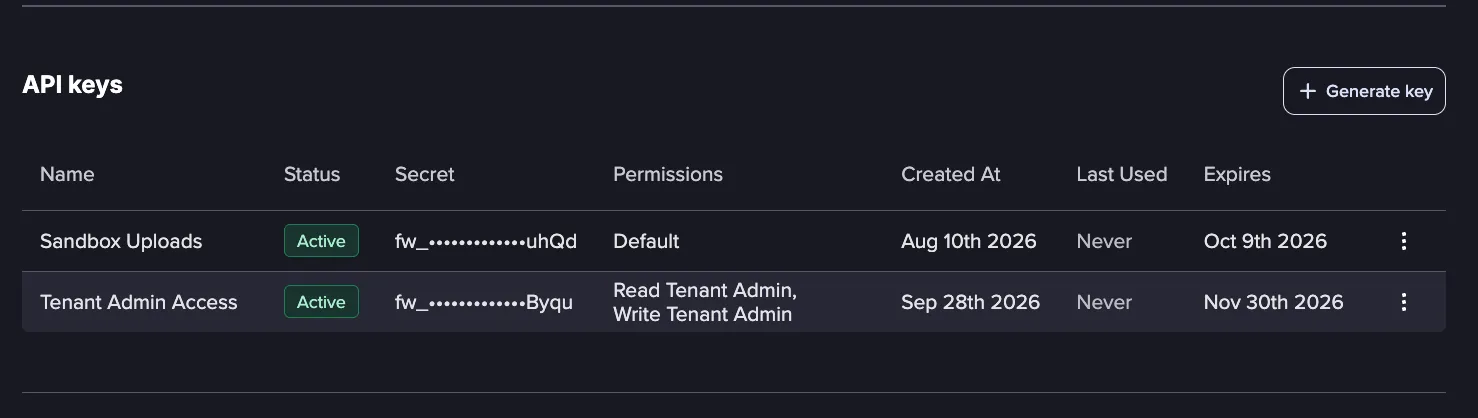
Each key in the list shows:
- Name: The name of the key.
- Status: Whether the key is currently active or disabled.
- Secret: A masked preview of the key's secret, shown in full only once at creation.
- Permissions: The key's scope, either Default or the specific permissions assigned.
- Created At: The date the key was created.
- Last Used: The last time the key authenticated, updated hourly, or Never if unused.
- Expires: The key's expiration date, or Never if none is set.
Tip: Hover over the dates to see the exact timestamps.
Creating an API Key
Follow these steps to create a new API Key:
In the API keys section, click Generate key.
Enter a Name to identify the key.
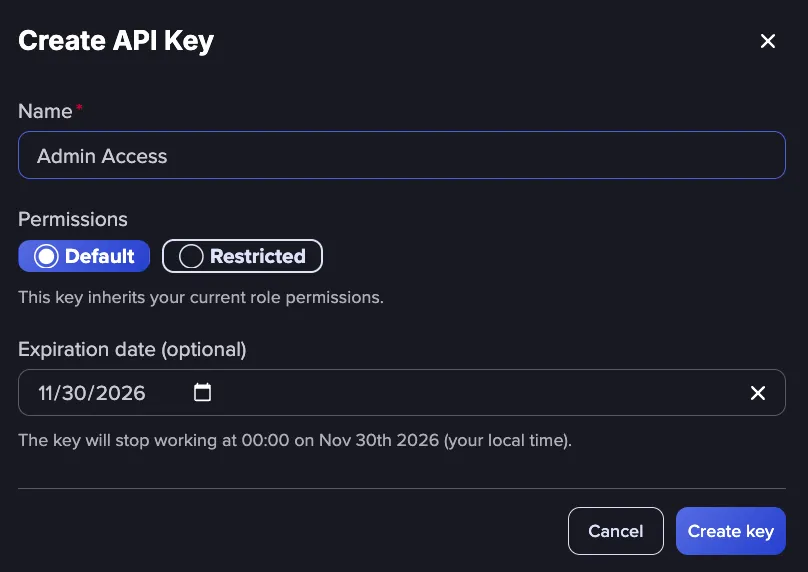
Under Permissions, choose how the key is scoped:
- Default: The key inherits your current role permissions.
- Restricted: The key is limited to the specific permissions you select. A key set to Restricted must have at least one permission selected. Each permission level allows you to select Read or Write access.
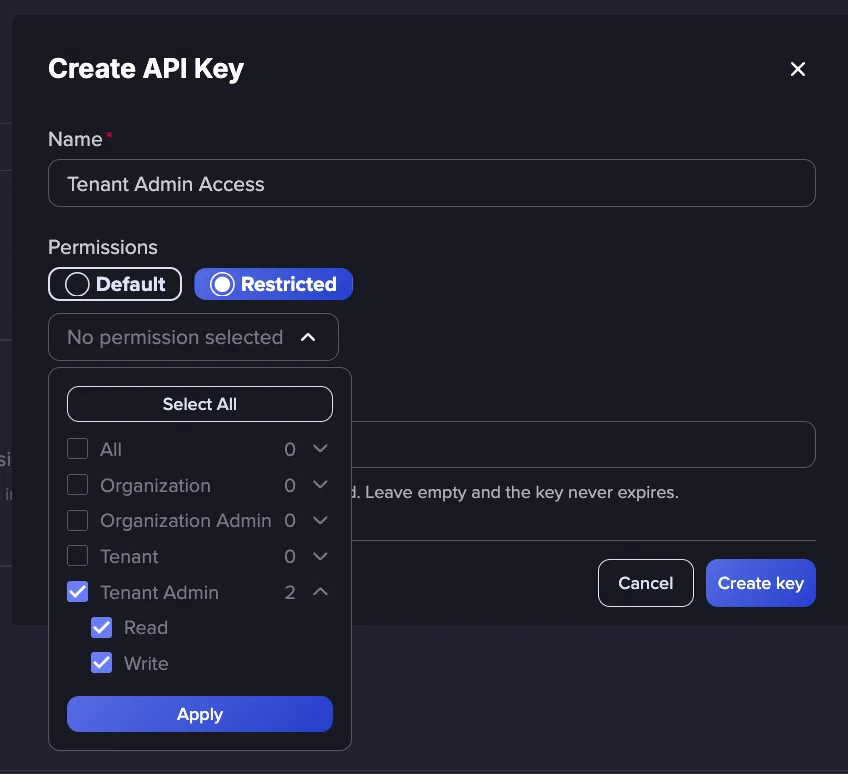
To set an expiration, choose a date in Expiration date setting. The key expires at midnight local time on the date you select. If you leave this field empty, the key never expires. Setting an expiration is recommended but optional.
Click Create key. In the API Key Generated dialog, click the copy icon to copy the Secret and store it somewhere secure, such as a password manager.
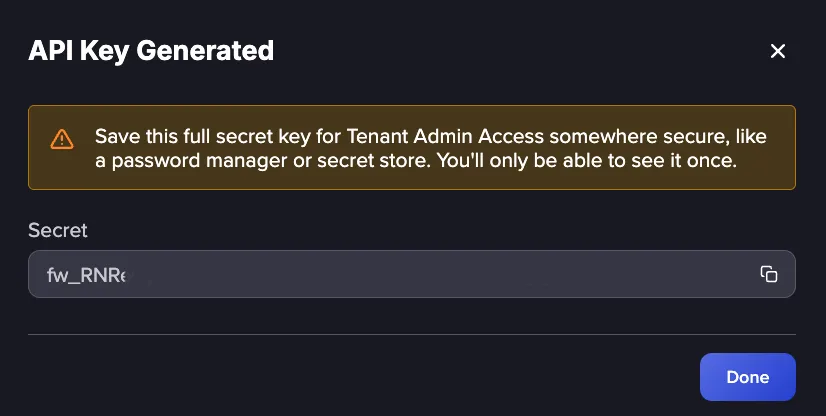
The secret is shown only once, when the key is first created. It cannot be viewed again afterward. If you lose the Secret for an API key, delete the key and create a new one.
Managing an API Key
You can perform the following action on an API key after it has been created:
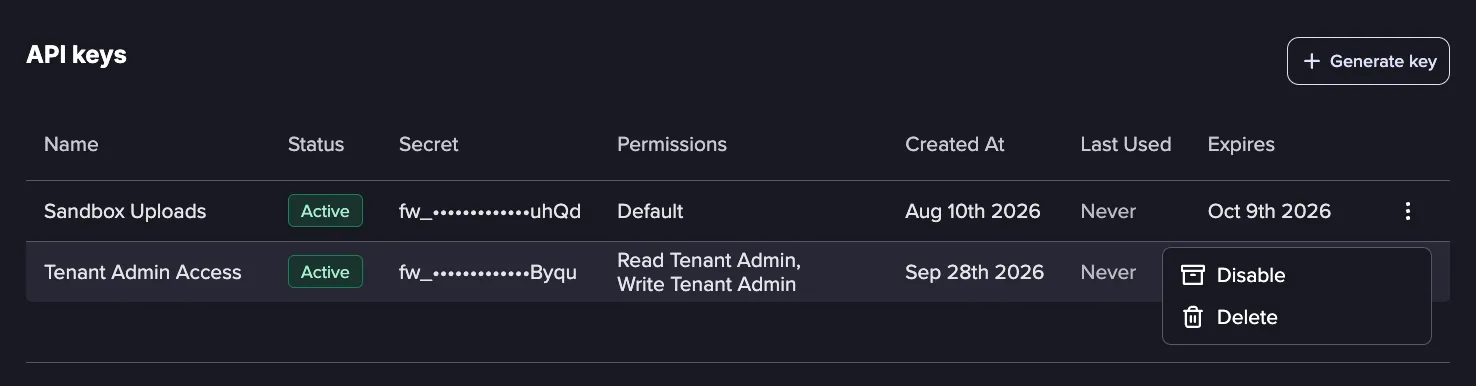
- Disable a Key: Disabling a key stops it from authenticating requests. A disabled key can be re-enabled later
- Delete a Key: Deleting a key permanently removes it. Any workflow or integration using the key loses access. This action is irreversible so proceed with caution.
- Edit a Key: Click an existing key to change Permissions or the Expiration date.
API Keys for Deleted Users
When a user is deleted, all API keys they own are also deleted and can no longer be used.
Tenants
The Tenants section shows details about the Tenants you currently have access to. From here you can also select your Default Tenant, which is the Tenant that opens automatically when you first log in to Flare.