IEM Okta Setup
The Okta IdP integration allows you to sync user identities from your Okta organization directly into Flare as Identity Identifiers. Once synced, Flare can automatically validate exposed credentials against those identities whenever a new leaked credential is detected, and perform mitigation actions on compromised accounts.
Important to Note
The Okta integration is available on request. Please reach out to your CSM to get access.
Identity synchronization After the integration is configured, the initial sync can take up to 24 hours to complete. Once the initial sync has run, identities are automatically synchronized every night.
Tenant considerations
- Your Tenant has a cap on the number of Identity Identifiers. If you are syncing a large user base, consult with your CSM before enabling a full sync.
- Currently, one IdP integration per Tenant is supported. If you already have an Entra ID integration in a Tenant, create a new Tenant for Okta integrationcreate .
Identity Identifier Deletion
Identity Identifiers are automatically removed under the following circumstances:
- User deleted from Okta: If a user is removed from your Okta organization, the corresponding Identity Identifier in Flare is deleted after two weeks.
- Integration downtime: If your Okta integration goes down, all Identity Identifiers synced from Okta are deleted after two weeks.
It is recommended to restore a broken integration as soon as possible to avoid unintended deletion of Identity Identifiers. Tenant admins receive in-app notifications of a broken IdP integration through the Notifications CenterNotification Center.
Prerequisites for Okta
Before setting up the Okta integration in Flare, complete a few configuration steps in Okta. You can view our interactive product tours for a guided walkthrough, or follow the steps below.
Step 1: Create Groups, Resource sets, and Admin role
A Resource set is a collection of Okta resources, such as user groups, that limits the permissions of a custom admin role to specific resources. By binding the Flare service app to a Resource set, you can limit the integration to a specific subset of users rather than granting access to your entire Okta directory. For more information on Resource sets, see Okta's documentation on Working with Resource sets.
This step is optional. Custom groups, roles, and Resource sets are only required if you want to limit the integration to a specific subset of users. If you want to enable the integration for your entire Okta organization, you can use one of Okta's built-in Admin roles instead.
If you are not using custom groups, roles, or Resource sets, continue to Step 2: Create the Okta Service Appv
Create a Group of Users
First, let's create a group of users to assign to the Resource set. From the Okta Admin Console, go to Directory and then Groups.
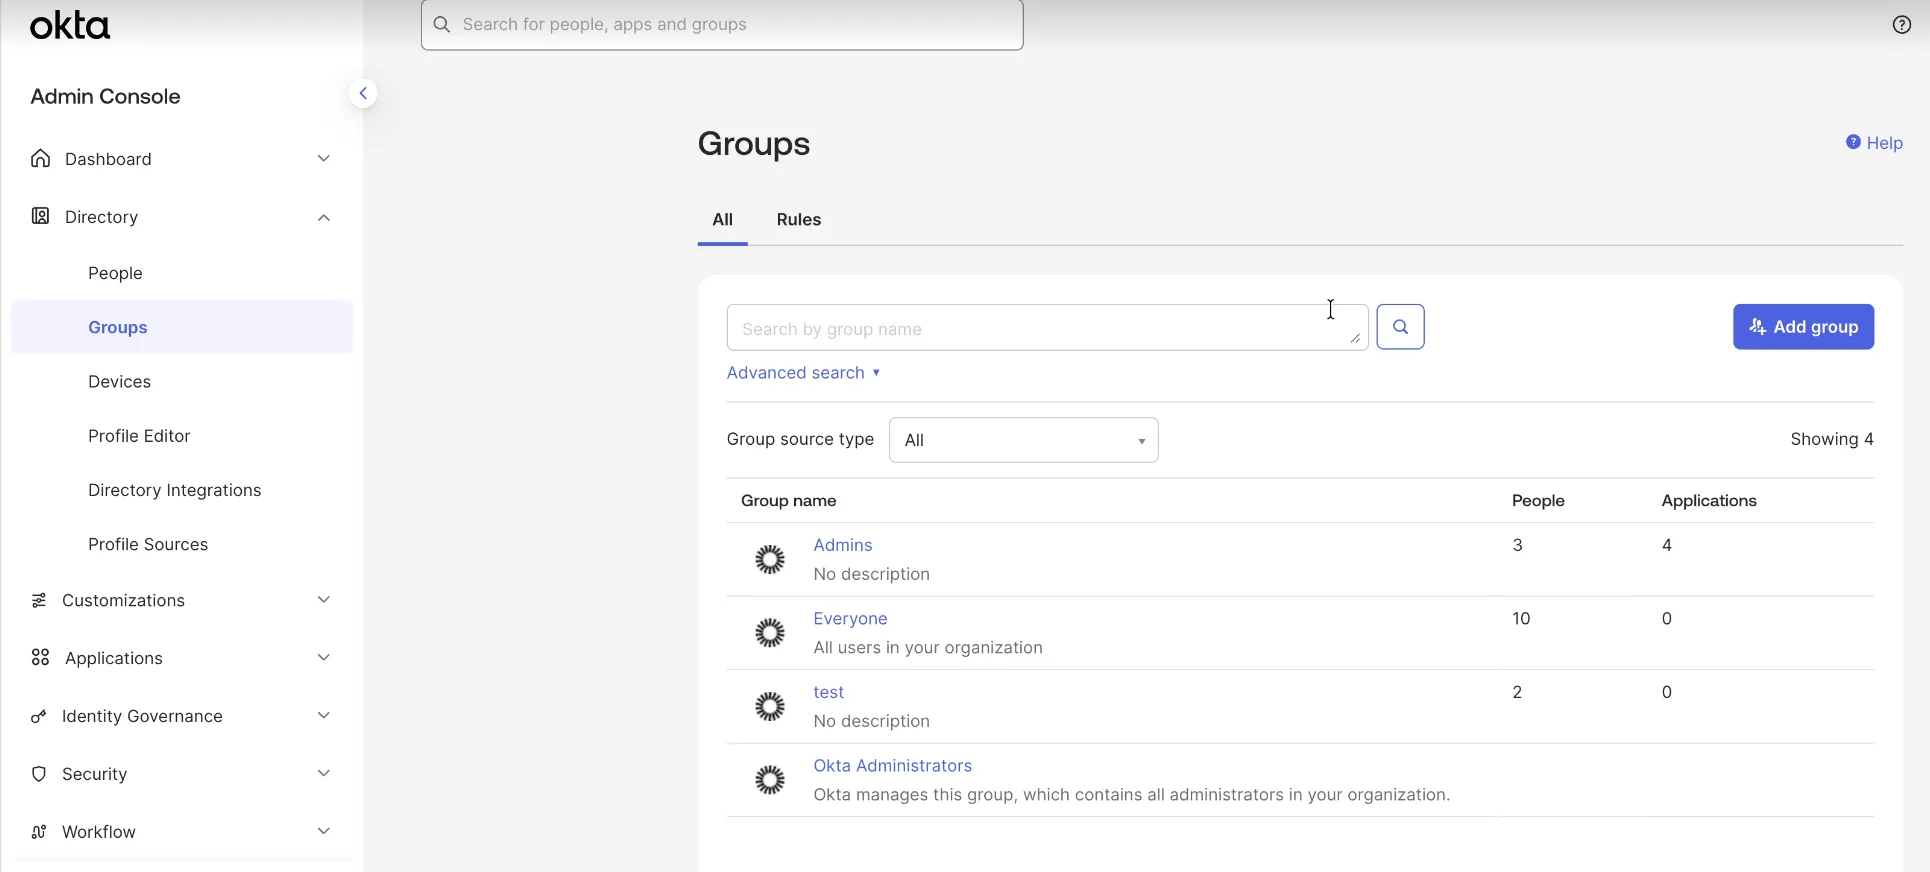
Click Add Group to create a new group. Provide a name and description for the group.
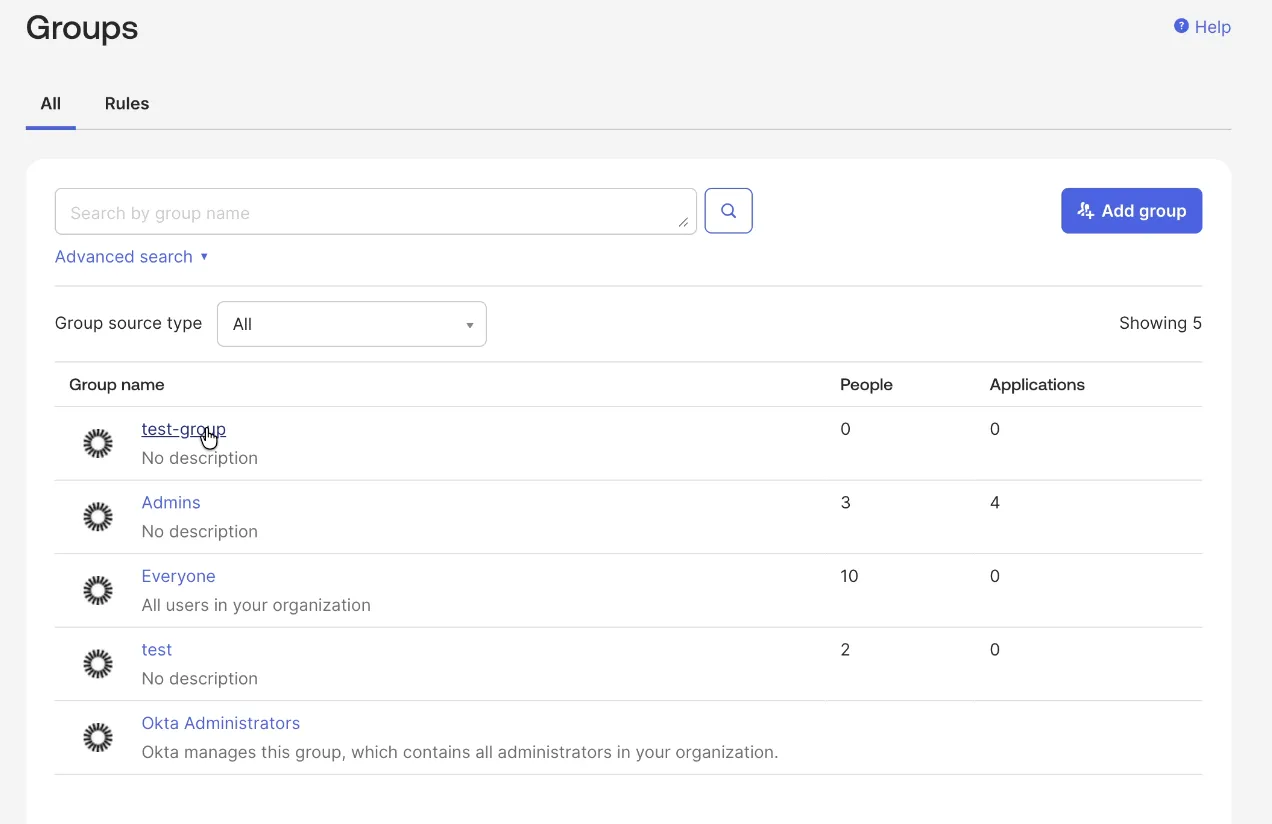
Click on the newly created group name to add users to it.
From the People tab, click Assign people to add users.
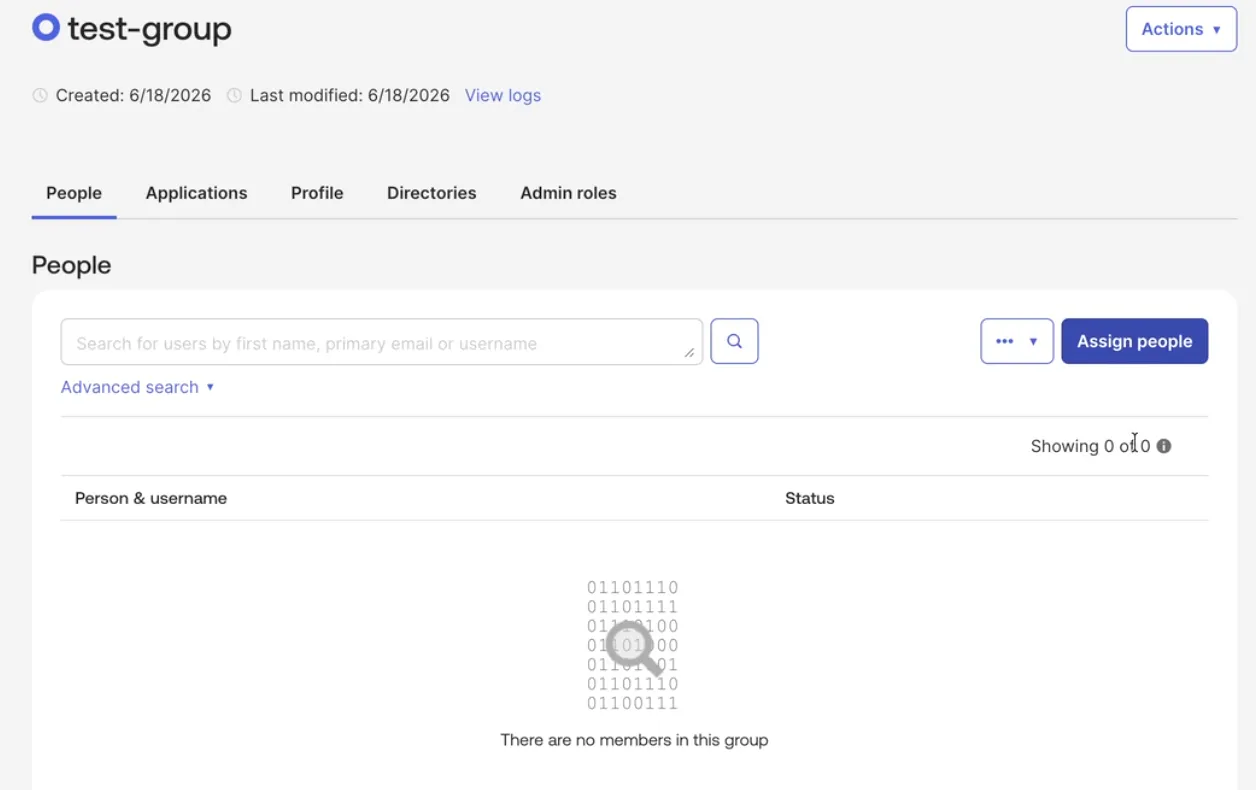
Click Done to save the group.
Create a Resource Set and Admin Role
Next, let's create a Resource set and Admin role.
From the Okta Admin Console, go to Security and then Administrators. Select the Resources tab to create a new Resource set.
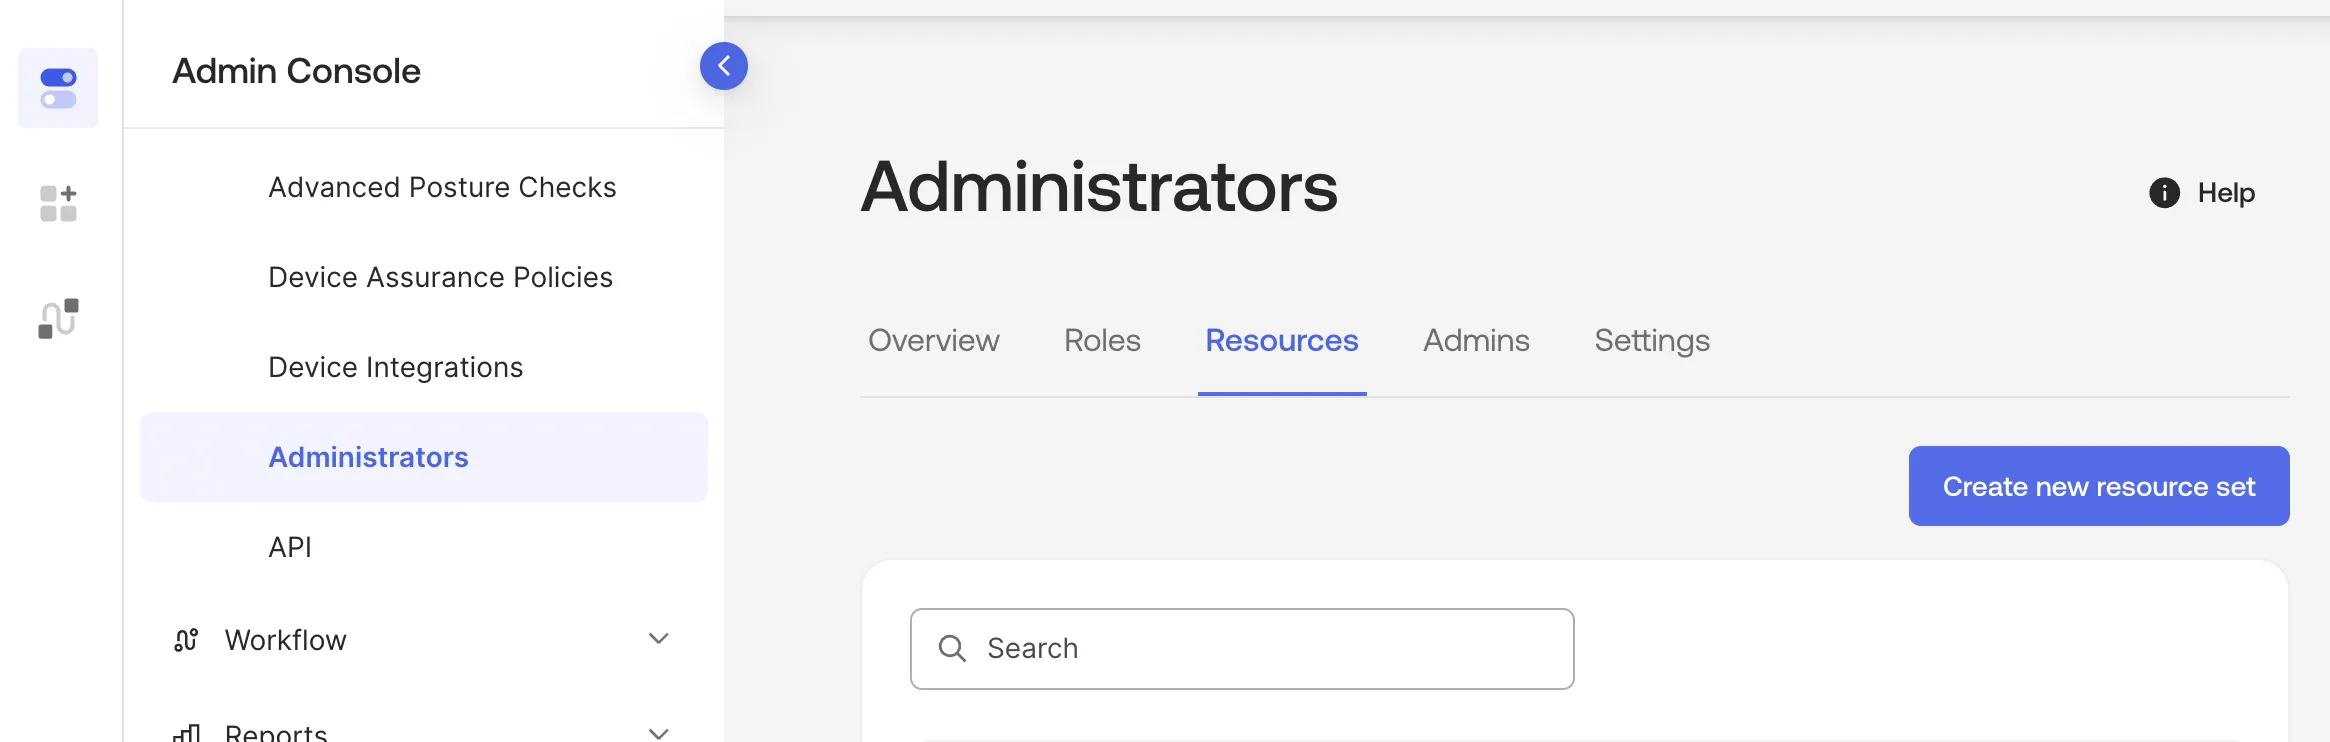
Click Create a new resource set, and enter a name and description.
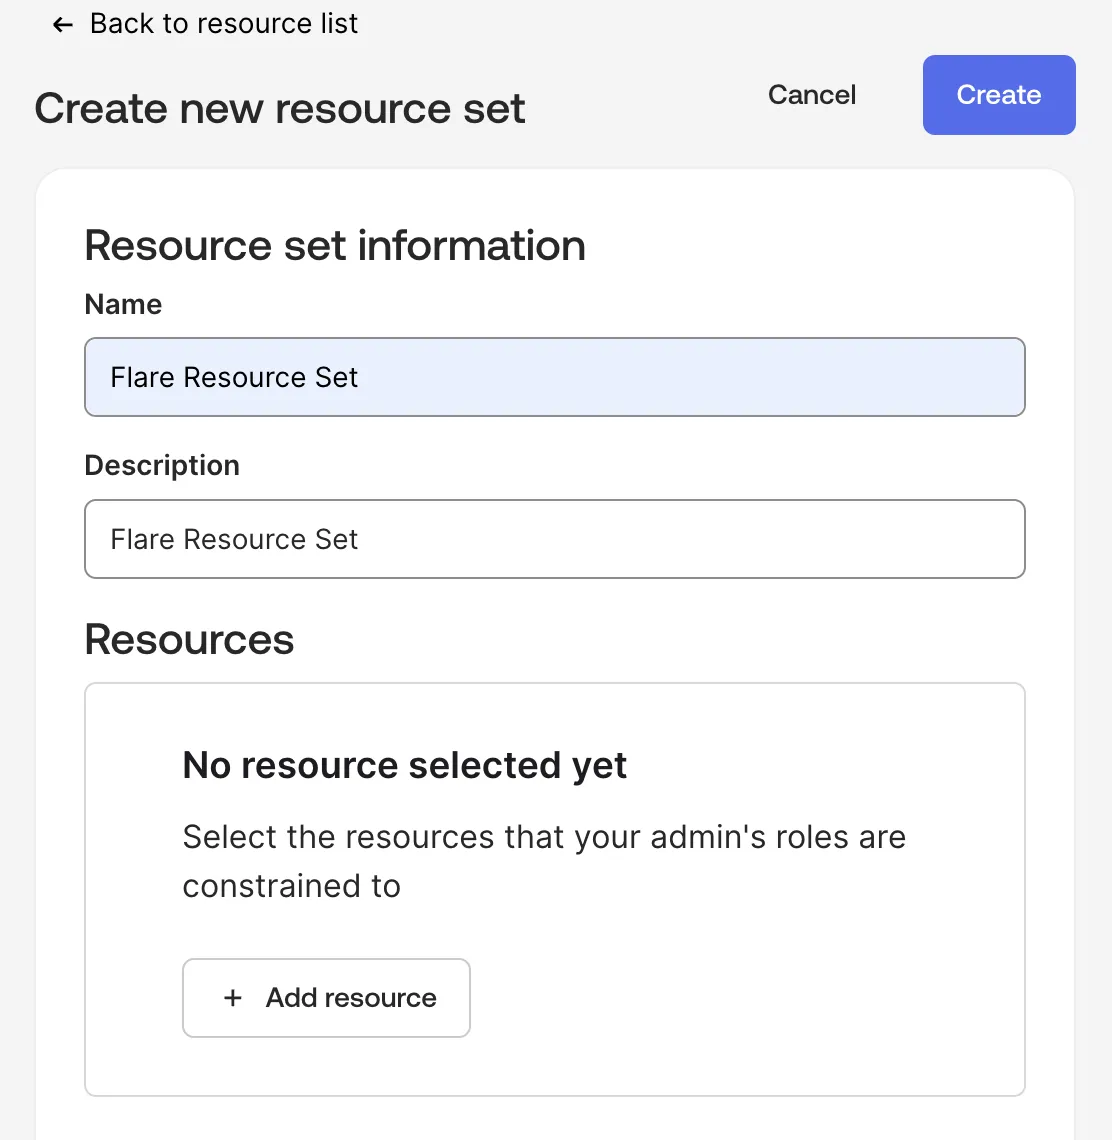
Click Add resource and select Users as the resource type.
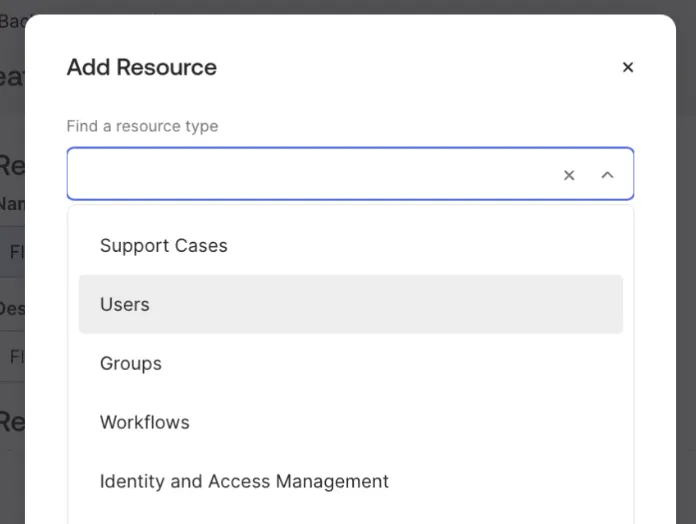
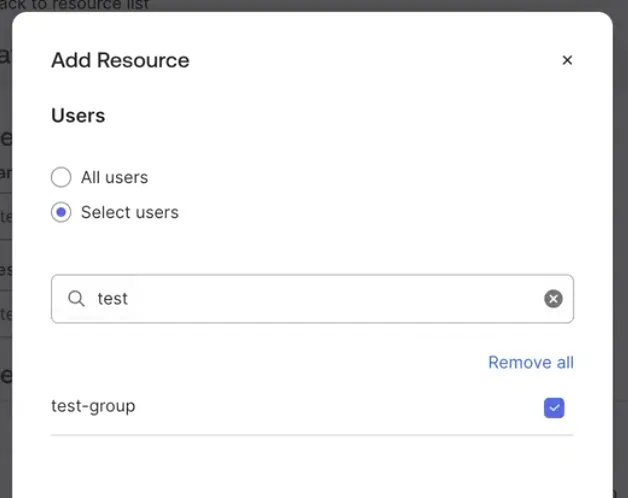
Important: When completing this step, select Users rather than Groups.
Use the Select Users option and select a group. Click Create to finish creating the Resource set.
Next, go to the Roles tab. You can use either one of the standard admin roles, or create a custom role.
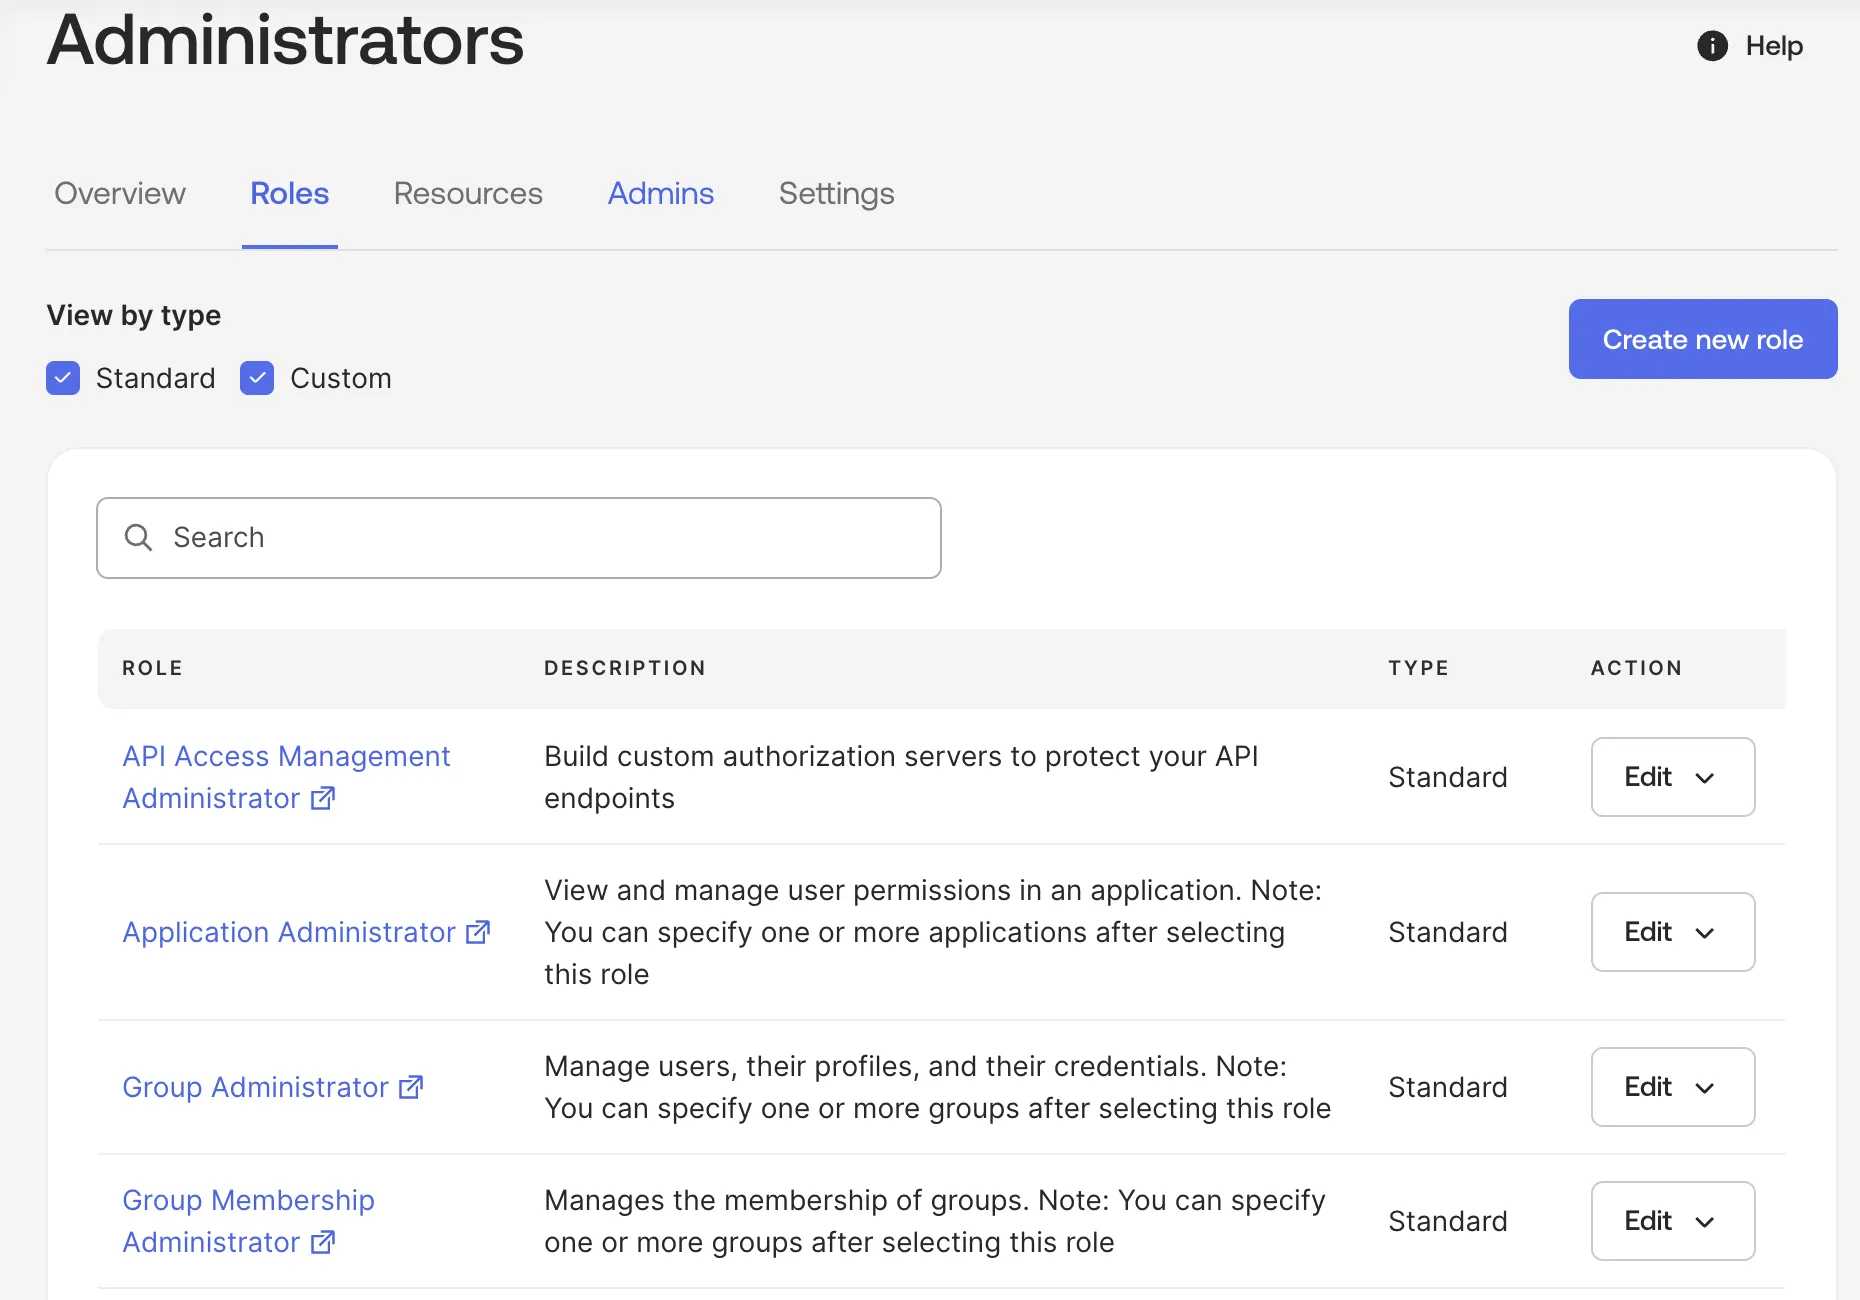
To create a custom role, click Create new role.
- To sync Identity Identifiers without any mitigation actions, select the View users and their details permission.
- To enable mitigation actions, select additional roles of Suspend users and Clear user's session.
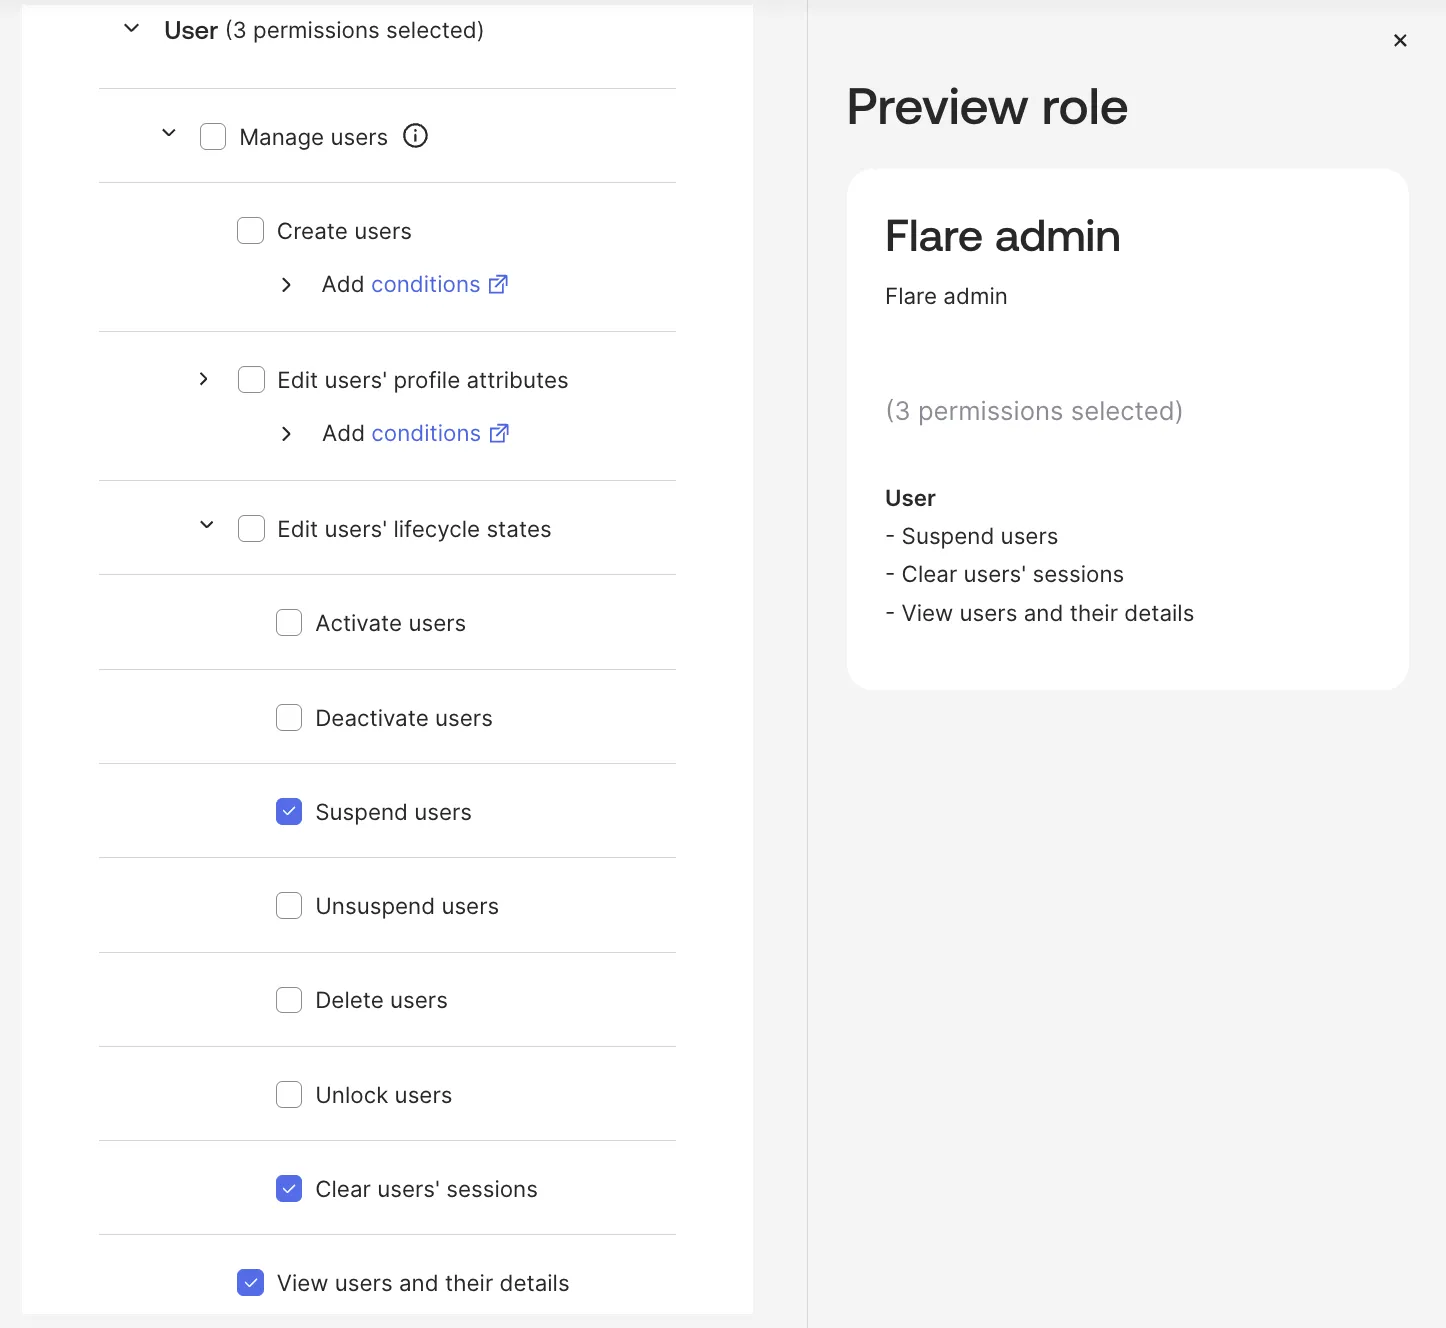
Click Save Role to save the Admin role.
Step 2: Create the Okta Service App
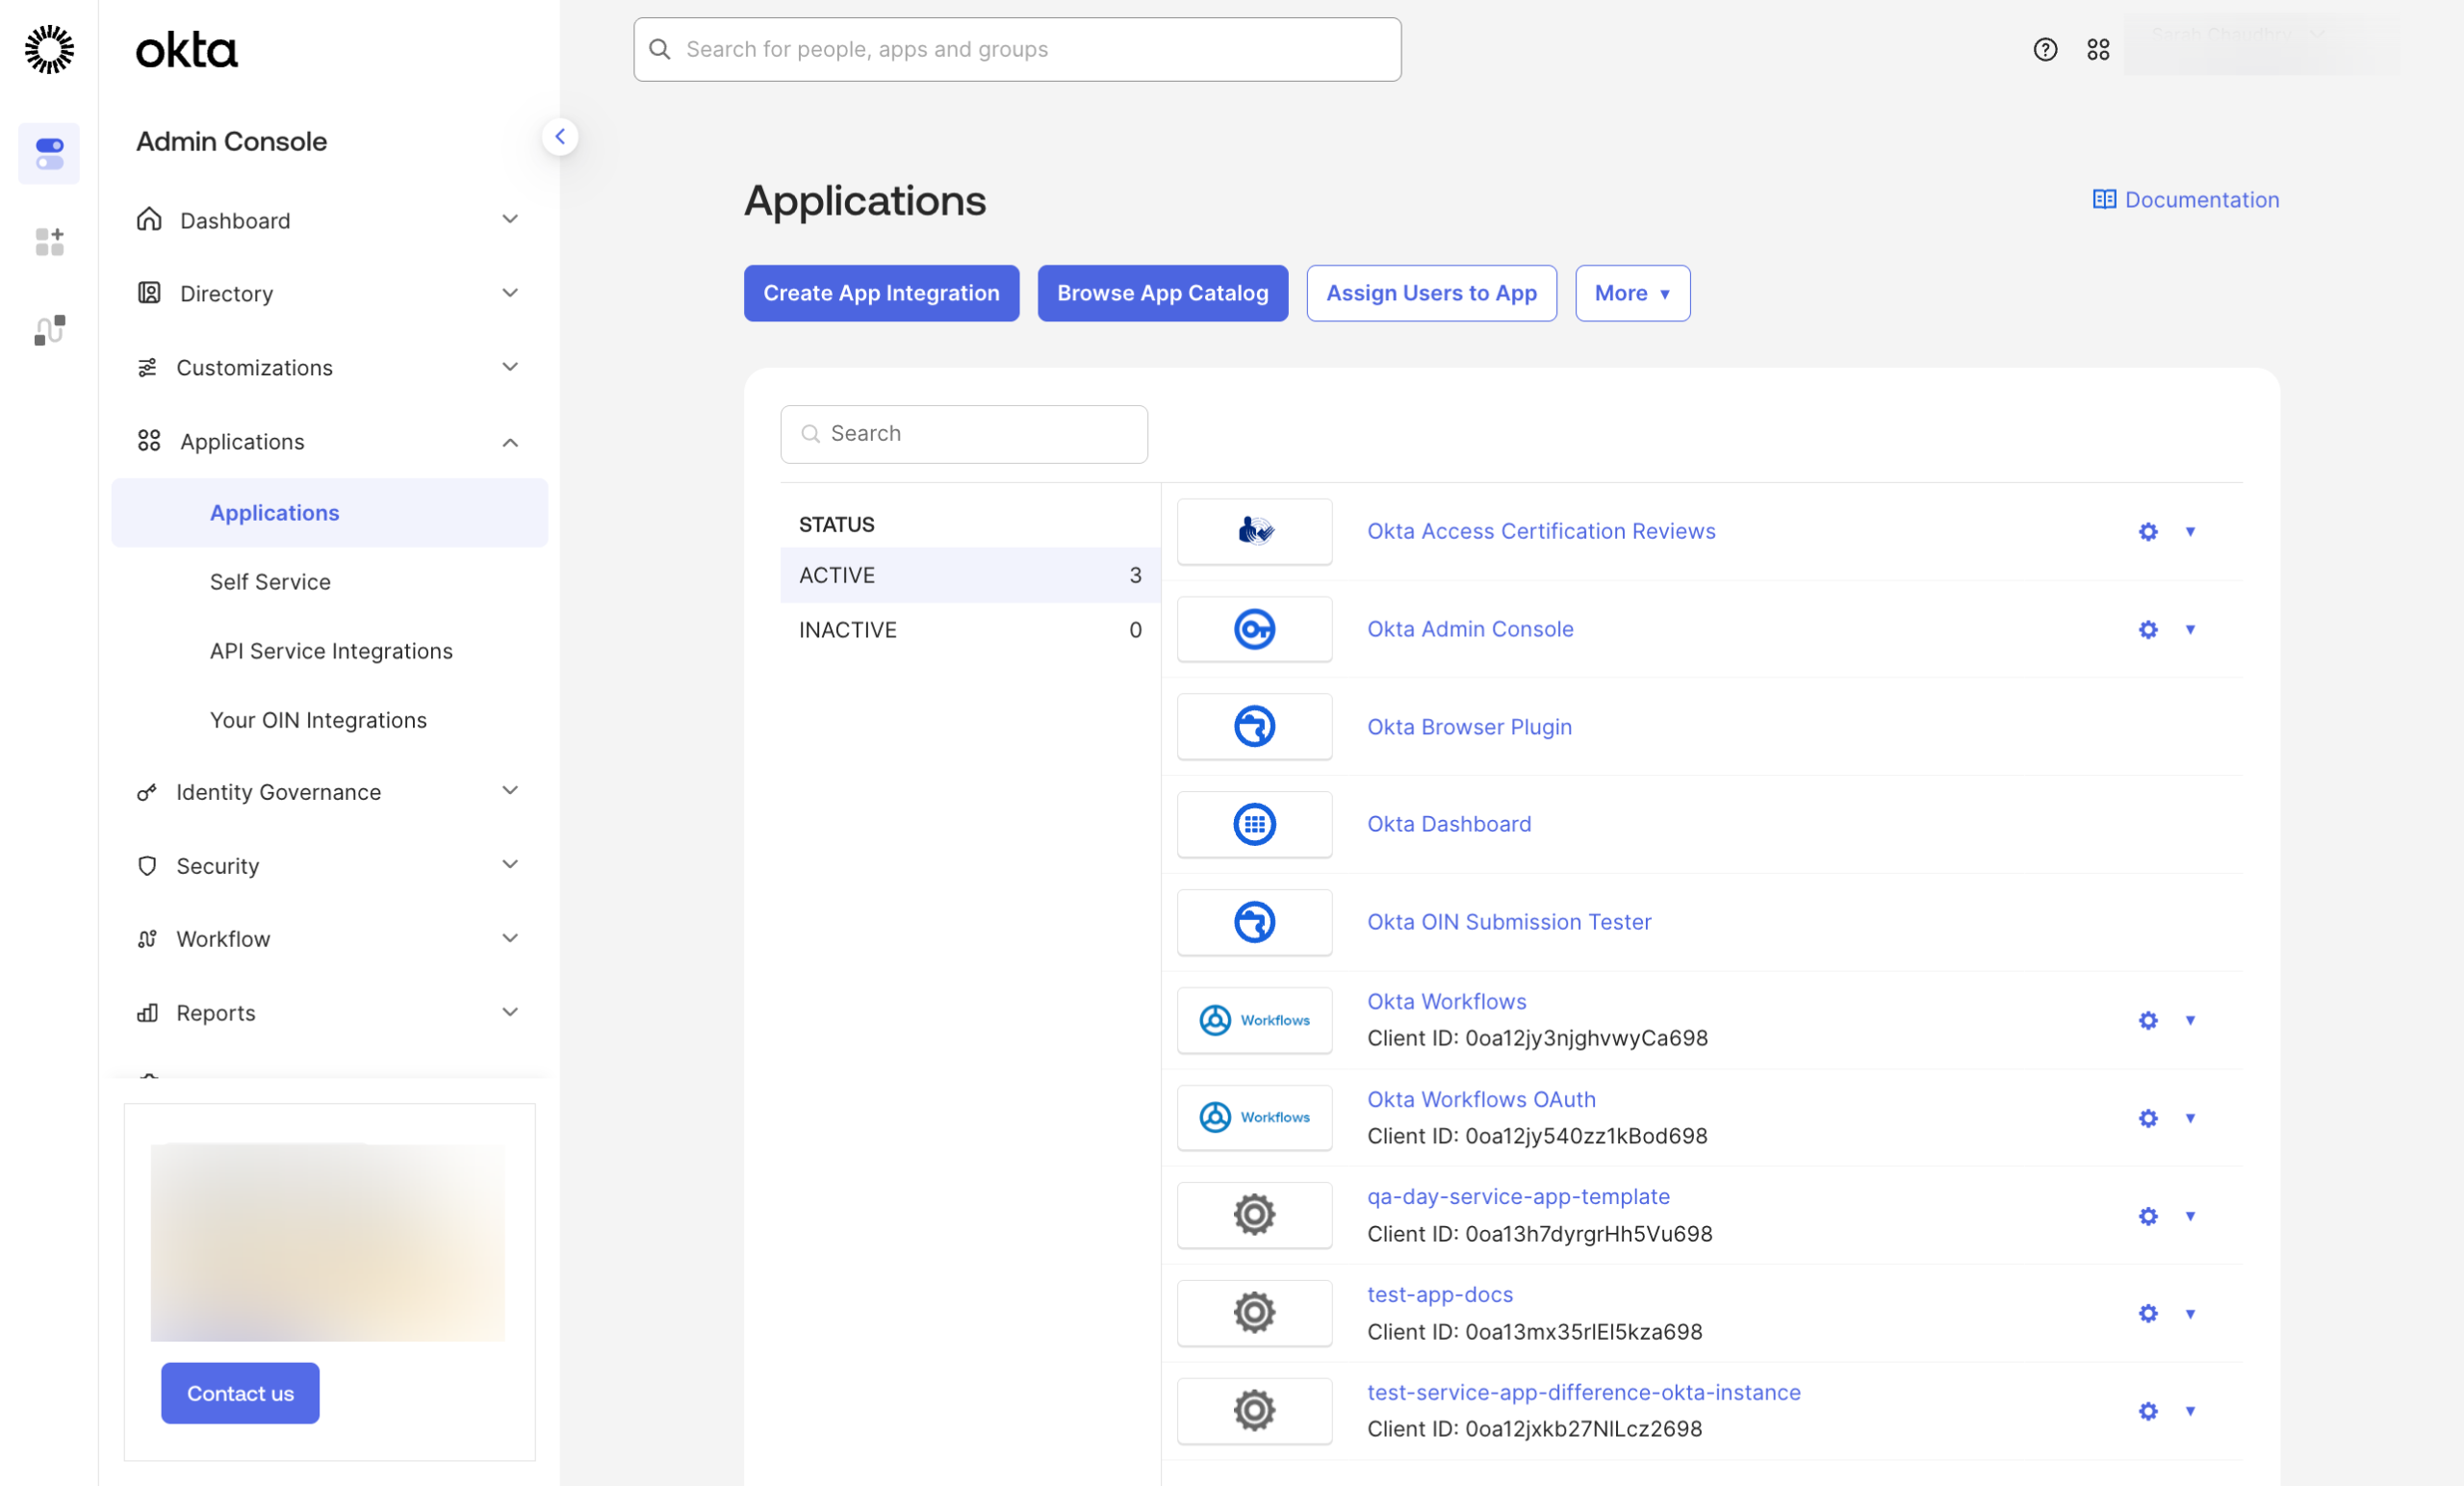
In the Okta Admin Console, navigate to Applications > Applications.
Click Create App Integration to start the setup.
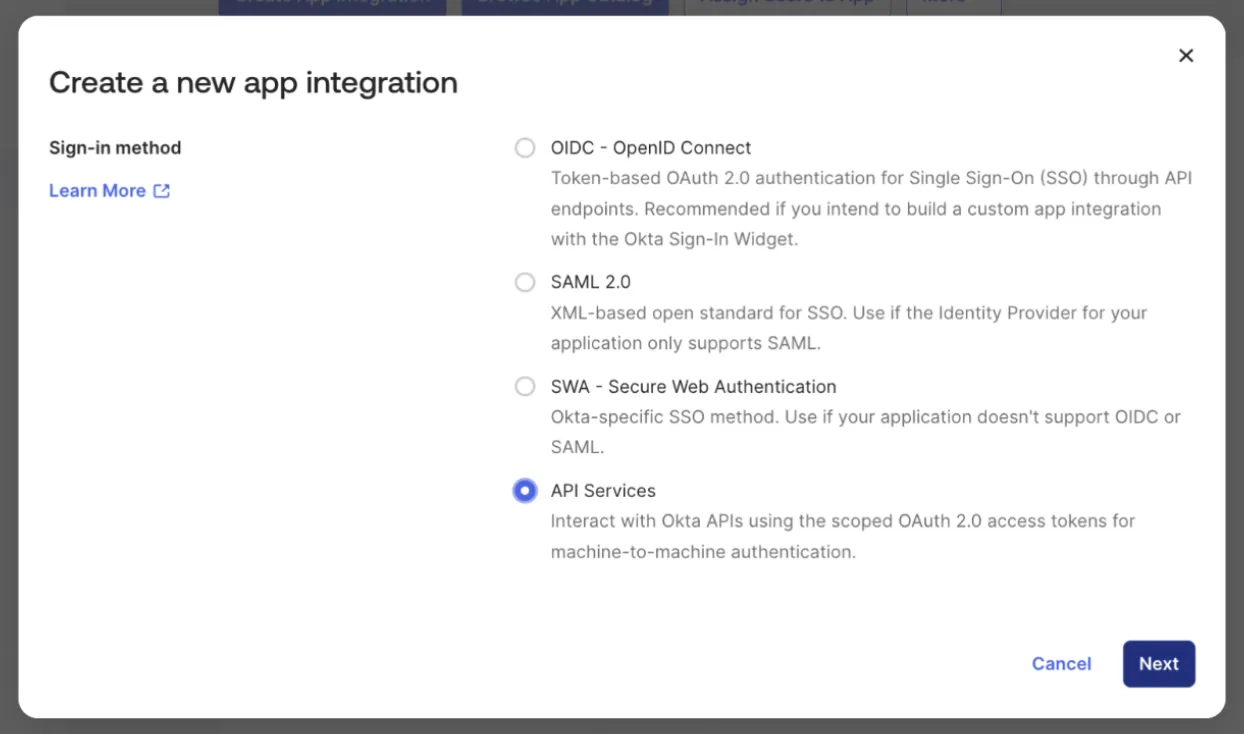
Select API Services as the integration type, then click Next.
Enter a name for your integration and click Save.
In the Client Credentials section, click Edit and set the Client authentication option to Public key / Private key.
Under Public Keys, select Use a URL to fetch keys dynamically and enter the following URL:https://api.flare.io/.well-known/jwks.json
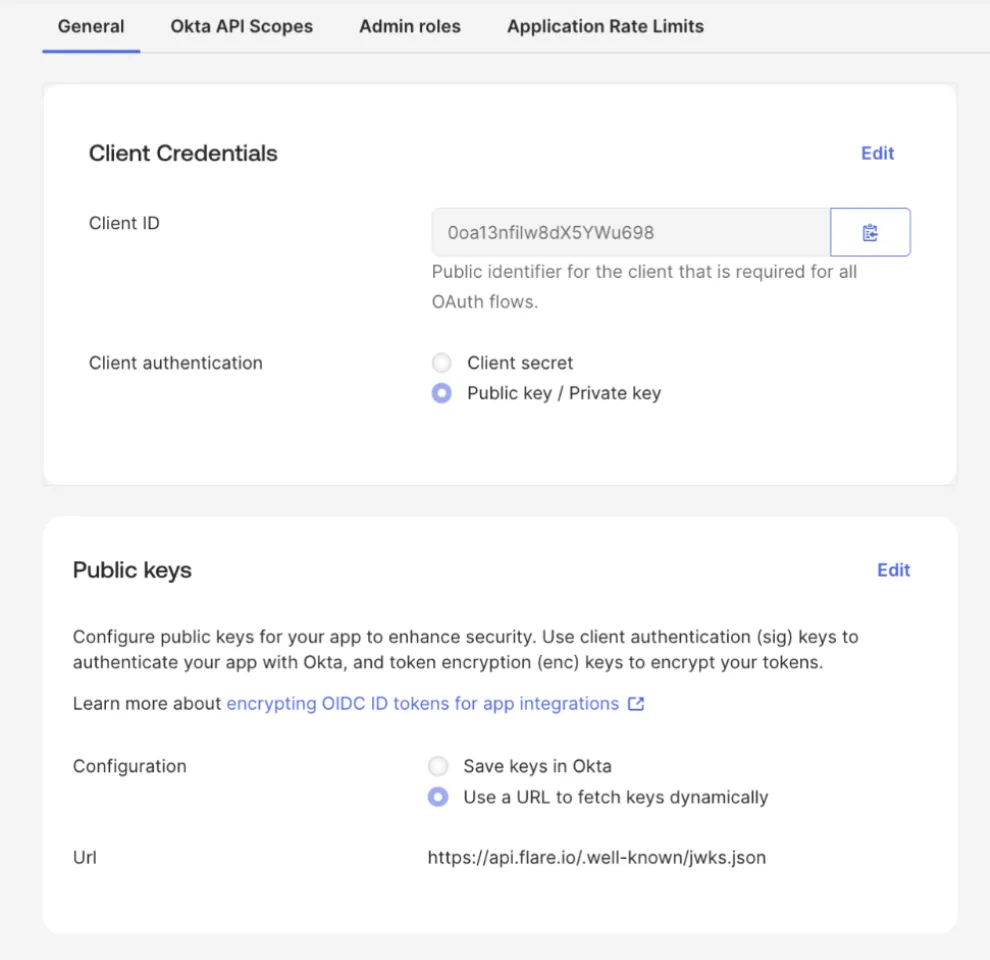
Select Okta API Scopes to grant permissions.
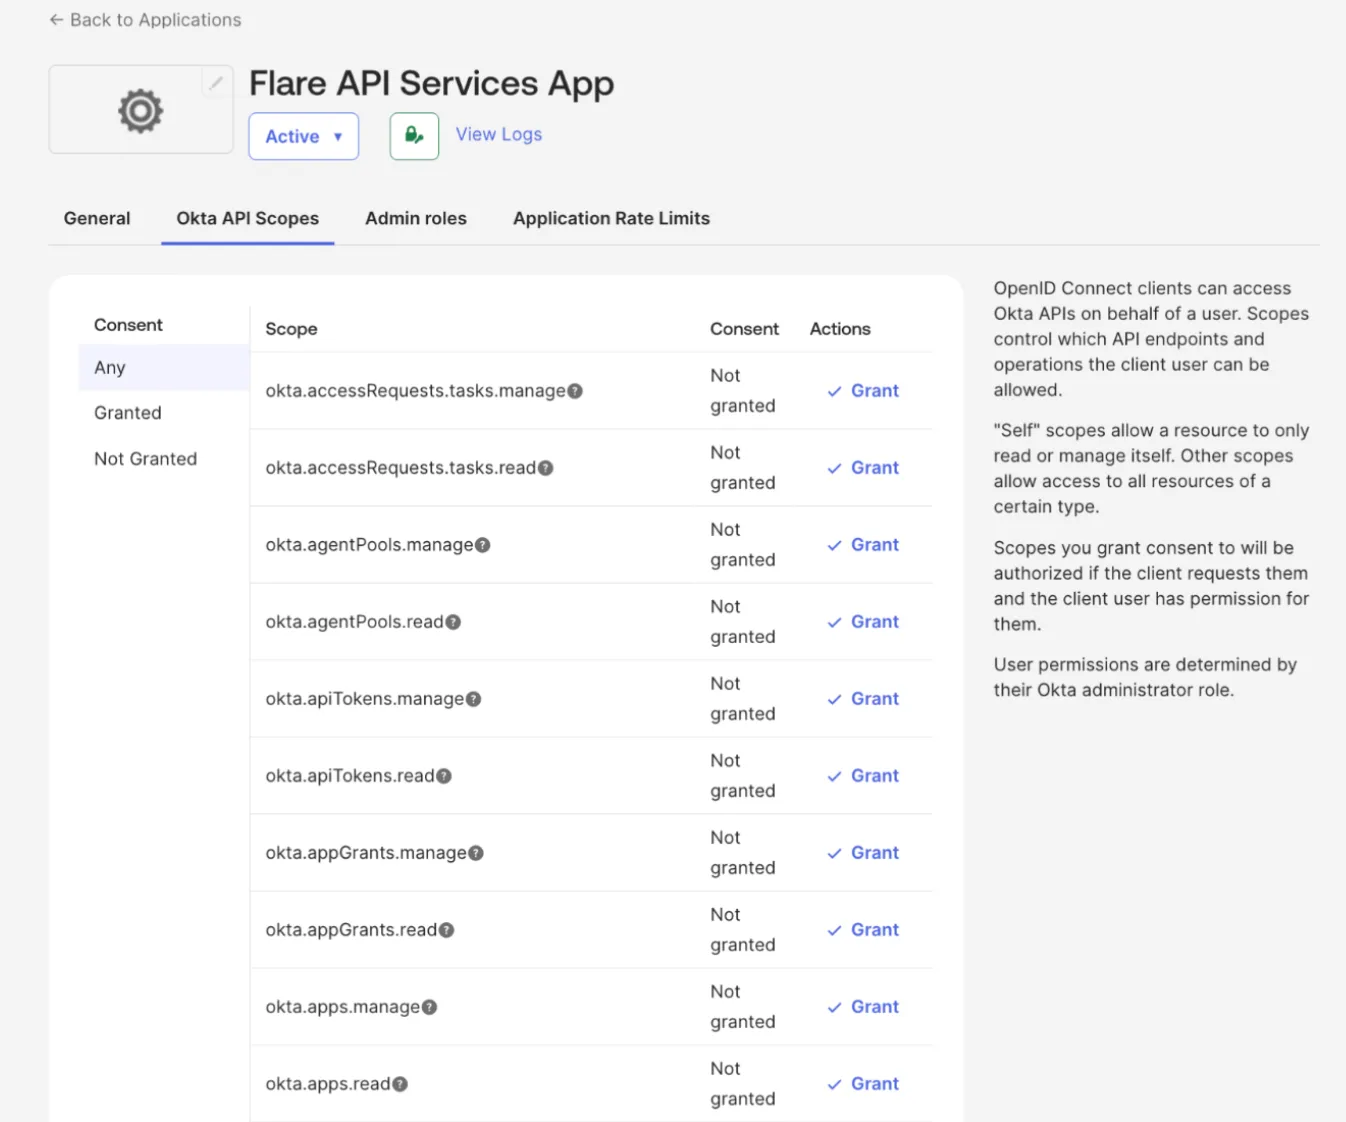
Grant one or both of the following OAuth 2.0 Scopes based on your needs:
- okta.users.read - Required for syncing user identities into Flare and creating Identity Identifiers.
- okta.users.manage - Required for automated and manual mitigation actions, such as revoking sessions and disabling users.
It is recommended to start with okta.users.read scope. Add okta.users.manage only when you are ready to enable mitigation.
Navigate to the Admin roles tab to assign administrative permissions.
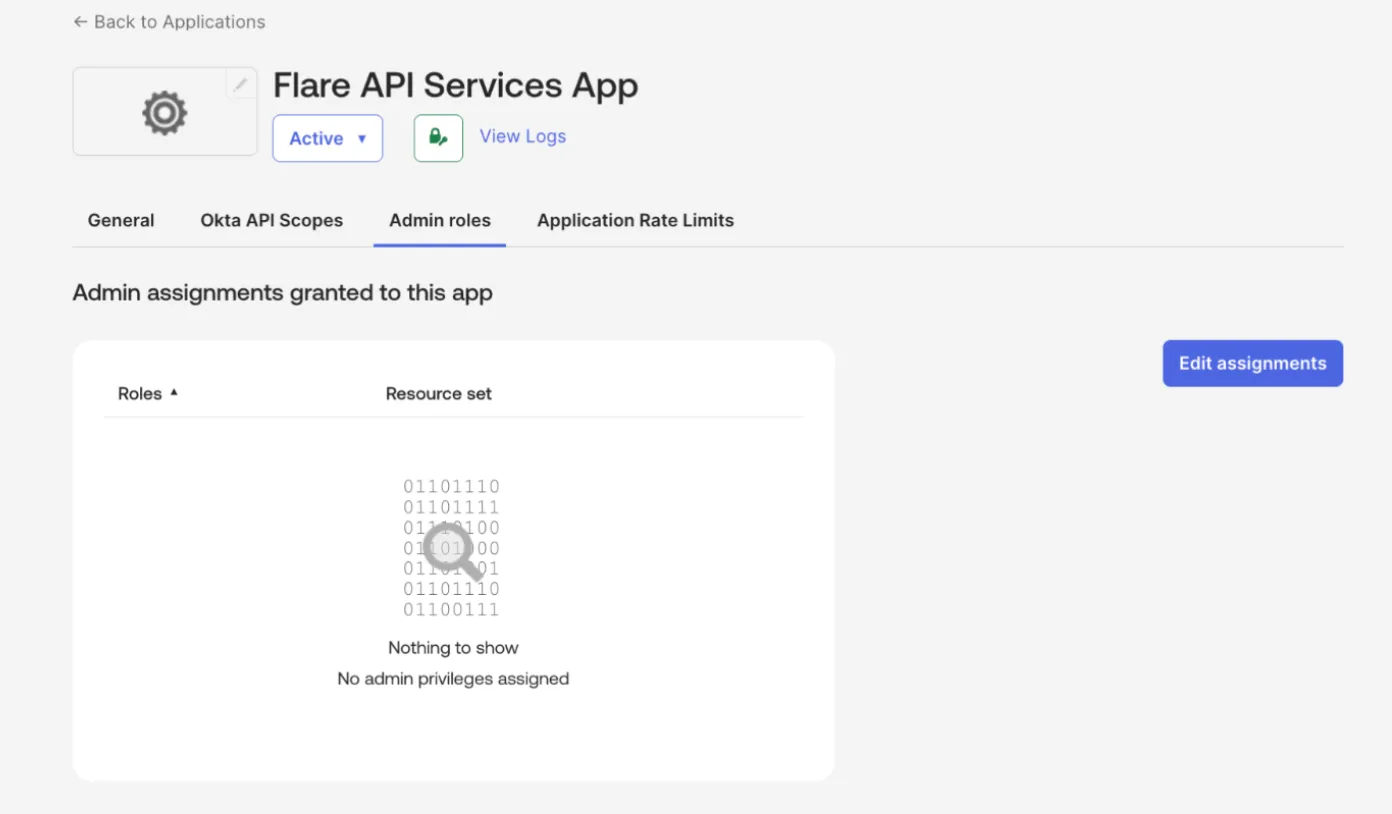
Follow these guidelines when using a standard admin role:
- Read-only admin role: Use this to sync only the Identity Identifiers without any remediation actions.
- Group admin role: Use this role to allow mitigation actions in addition to the Identity sync. For more information, view Okta's Standard roles and permissions documentation.
Click Edit assignments. Select the Admin role and Resource set you configured earlier, then click Save Changes.
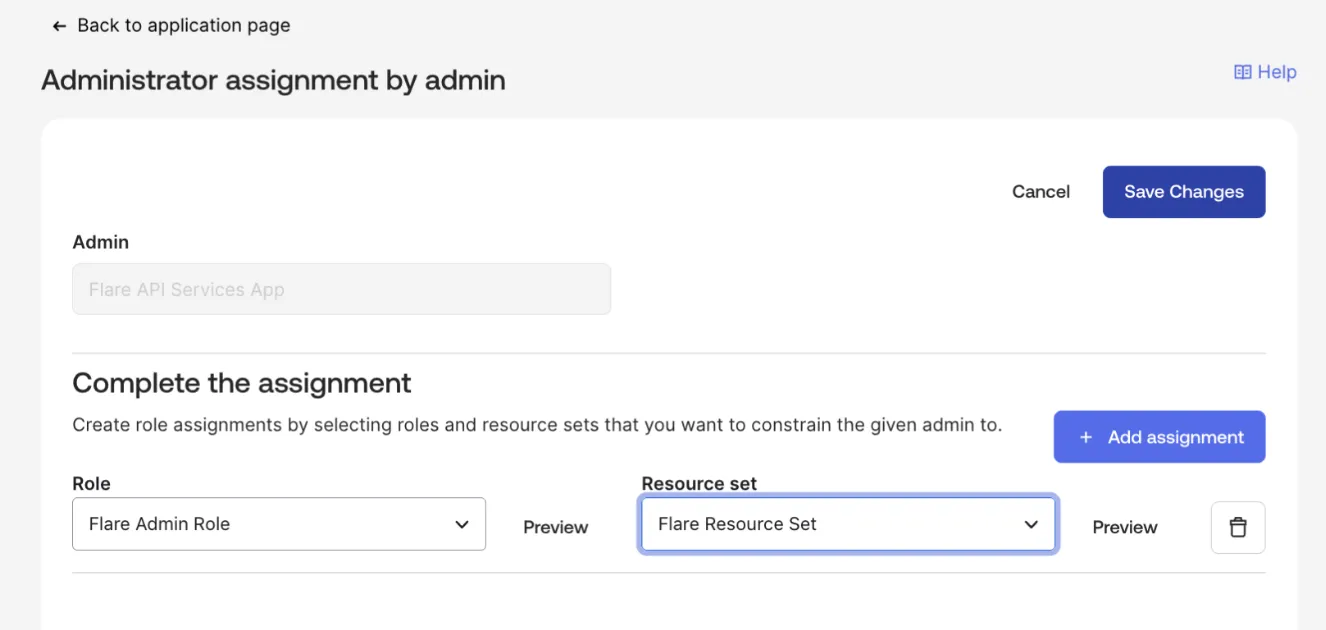
Click Save Changes. The Service app is now ready to use.
Configure Okta Integration in Flare
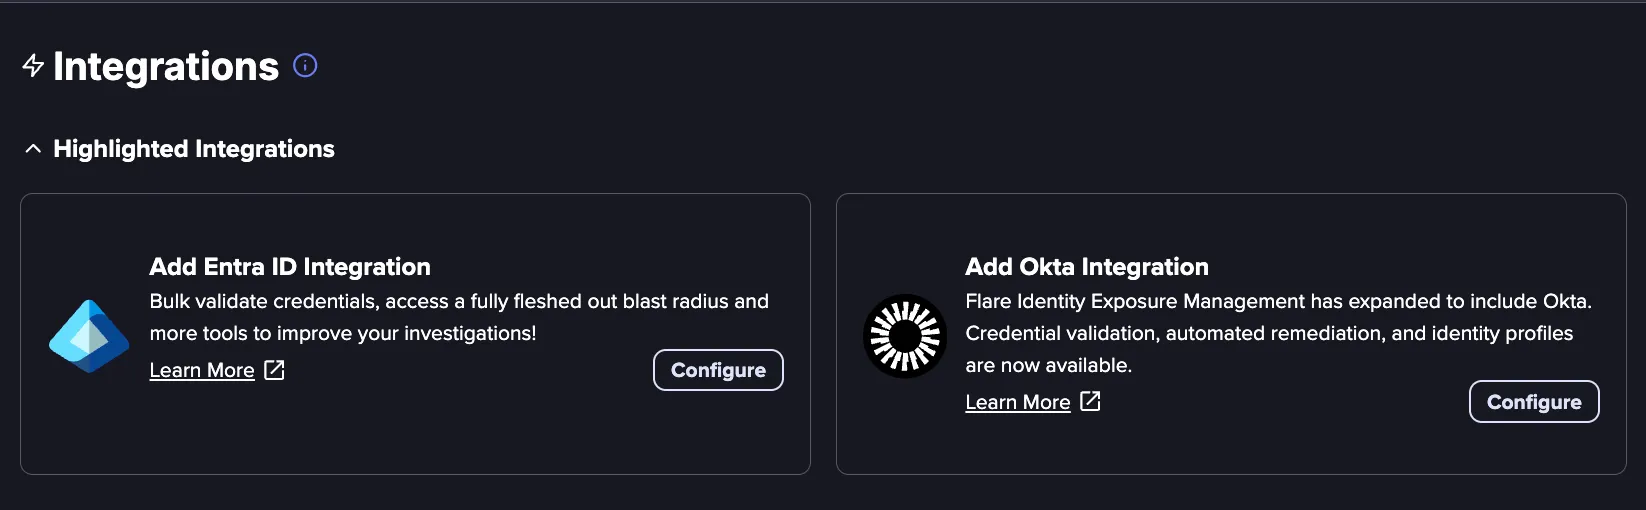
Navigate to the Settings menu in the top-right corner, and then click Integrations.
Find the Add Okta Integration box and click Configure.
Enter the following information:
- Integration Name: A descriptive name for the integration
- Okta Domain: URL of your Okta domain
- Okta Service App Client ID: Client ID of the Service App configured in Prerequisites for Oktapre.
- Maximum Daily Password Attempts: Maximum number of validation attempts per identity per day. It is recommended to set this to half of your lockout policy threshold in Okta.
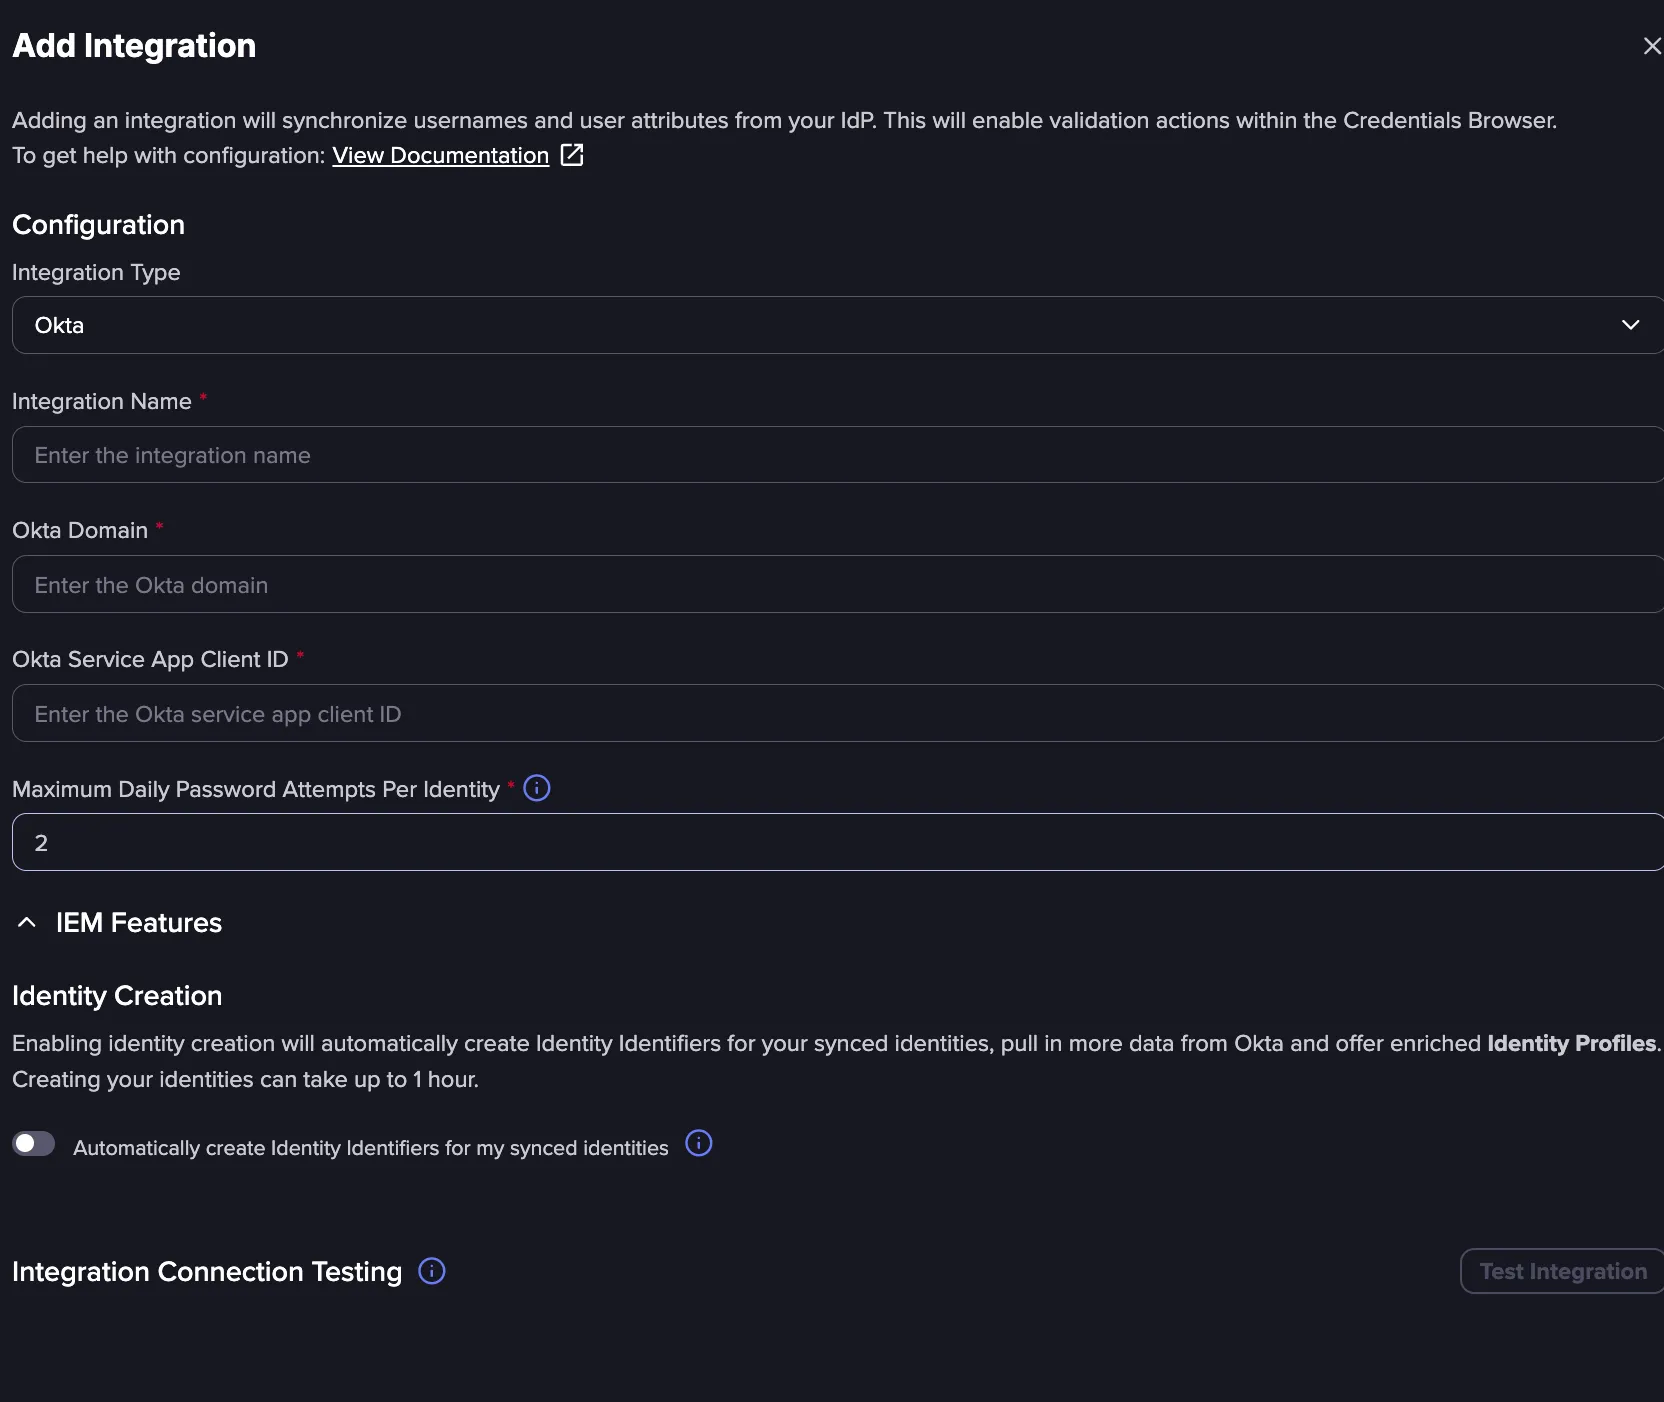
Daily limit of password validation attempts To prevent account lockouts, Flare enforces Maximum Validation Attempts per Identity per day. The default value for this in Flare is 2, and we do not recommend going higher than half your Okta lockout policy threshold (if the value is set to 10 in Okta, do not go higher than 5).
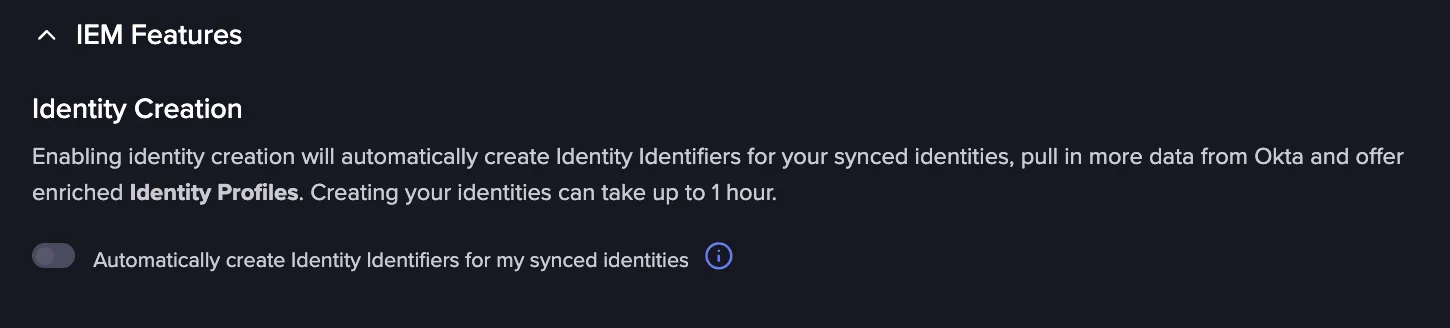
To automatically sync Identity Profiles, toggle the Automatically create Identity Identifiers for my synced identities option, and select automated or manual mitigation actions.
- Automated Validation: This requires the okta.users.read scope, and Okta Admin role with "View users and their details" permissions.
- Automatically Revoke sessions and disable accounts: This requires the okta.users.manage scope, and Okta Admin role with "Suspend users" and "Clear user sessions" permissions.
- Manual Mitigation: This requires the okta.users.manage scope, and Okta Admin role with "Suspend users" and "Clear user sessions" permissions. See Prerequisites for Oktapre for more information
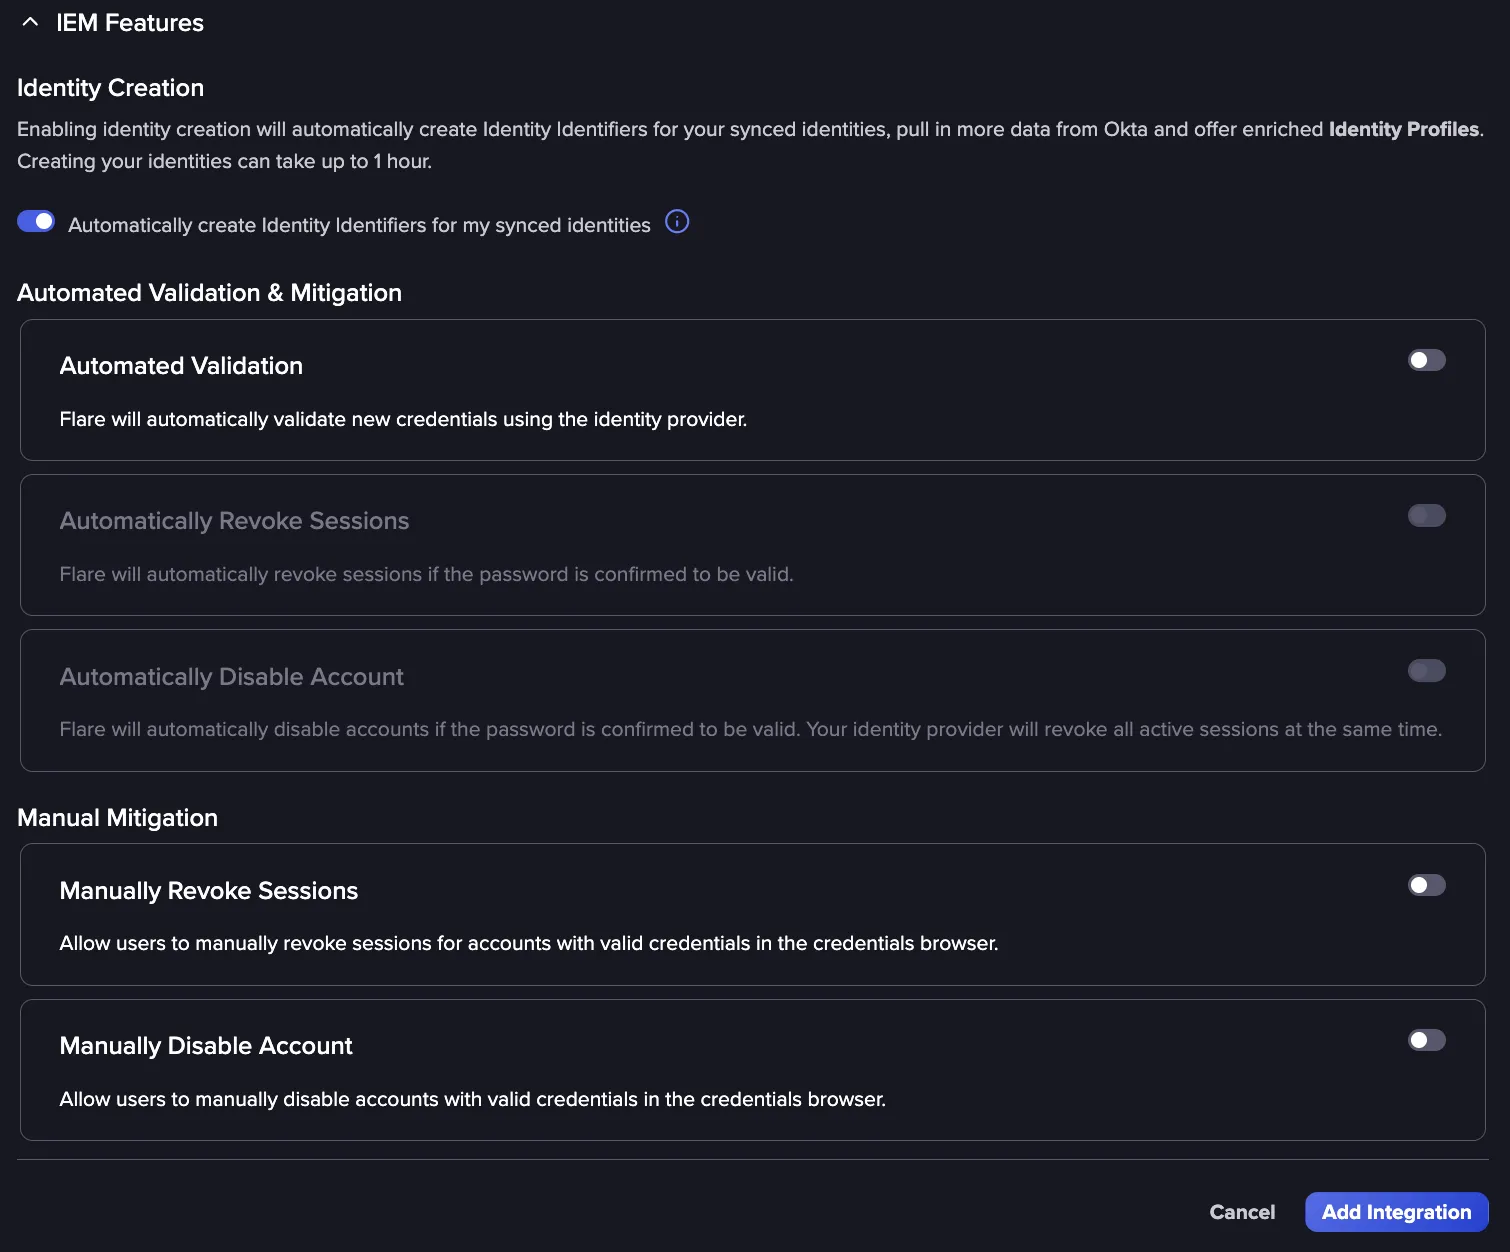
If you can't access this setting, reach out to your CSM to enable it.
Use the Test Integration button to test the integrations.
Click Add Integration to complete the integration procedure.
Tenant Requirement
Flare currently supports only one IdP integration per Tenant. If you already have an Entra ID integration in a Tenant, create a new Flare Tenant dedicated to the Okta integration.
Recommended Rollout Approach
- Create a new Flare Tenant.
- Configure the Okta integration scoped to a small pilot group.
- Validate identity sync, credential validation, and mitigation behavior.
- Expand scope incrementally to your full user population.
Starting with a small technically capable group limits the blast radius if anything unexpected occurs during testing, such as an account lockout.
Troubleshooting
This setting is not enabled by default. Please reach out to your CSM to get access.